> ## Documentation Index
> Fetch the complete documentation index at: https://docs.aftersell.com/llms.txt
> Use this file to discover all available pages before exploring further.
# 购后品牌样式设置
> 购后页面如何继承 Shopify checkout 品牌样式,以及不同 Shopify 套餐下应在何处编辑这些品牌样式设置。
你的购后页面样式由 **Shopify checkout 品牌样式**决定,与你的 checkout、感谢页和订单状态页使用相同的设置。它没有独立的样式设置。
如果你的店铺不在 Shopify Plus 套餐上,Aftersell 编辑器中的预览将与你的线上页面不一致。在这些套餐上,Shopify 不允许应用读取你的品牌样式,因此预览会回退到 Shopify 的默认设置。
这只影响预览;你线上的购后页面仍会使用你的真实品牌样式。要确认效果,请下一笔测试订单并查看购后页面。
Checkout 编辑器中不会显示购后页面,因此那里没有可预览的内容。但你的品牌样式仍会在后台应用到该页面。
编辑品牌样式的位置取决于你的 Shopify 套餐。
## 如果你不在 Shopify Plus 上(Shopify Plus 也适用)
Shopify 仅允许应用在 Plus 套餐上读取和写入 checkout 品牌样式,因此 Aftersell 无法显示或修改你的品牌样式。请改在 Shopify checkout 编辑器中进行修改。打开方式:进入 Shopify 后台的 **Settings → Checkout**,然后点击 **Customize**:
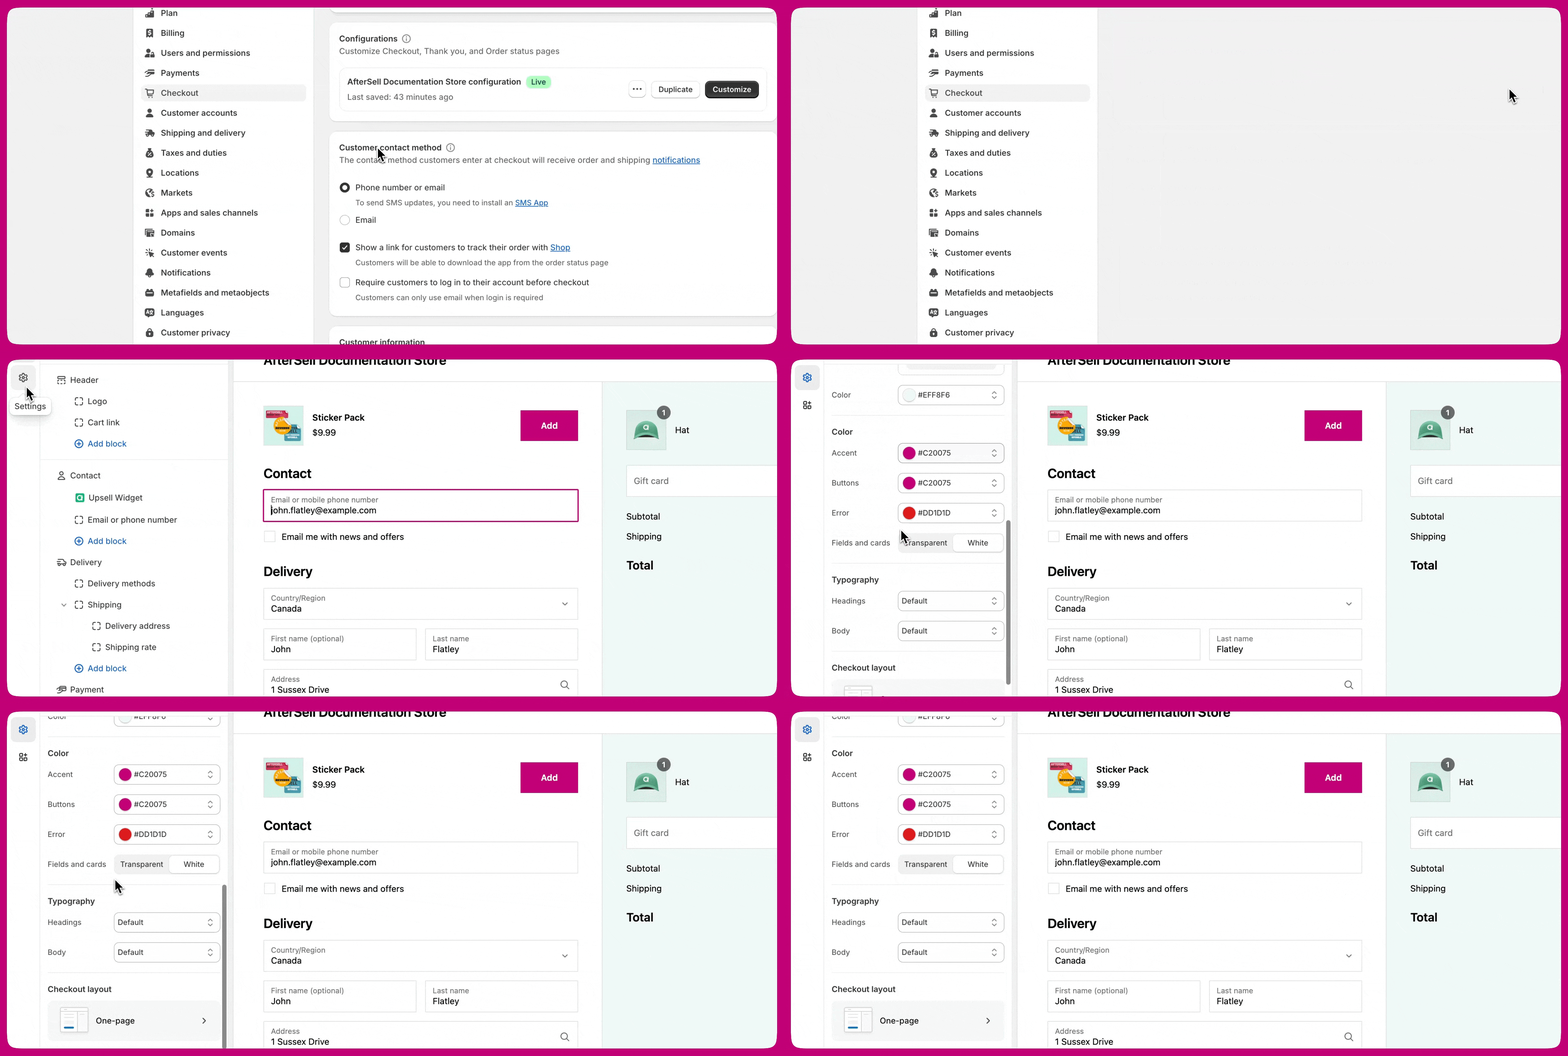 Checkout 编辑器中不会显示购后页面,因此那里没有可预览的内容。但你的品牌样式仍会应用到该页面。
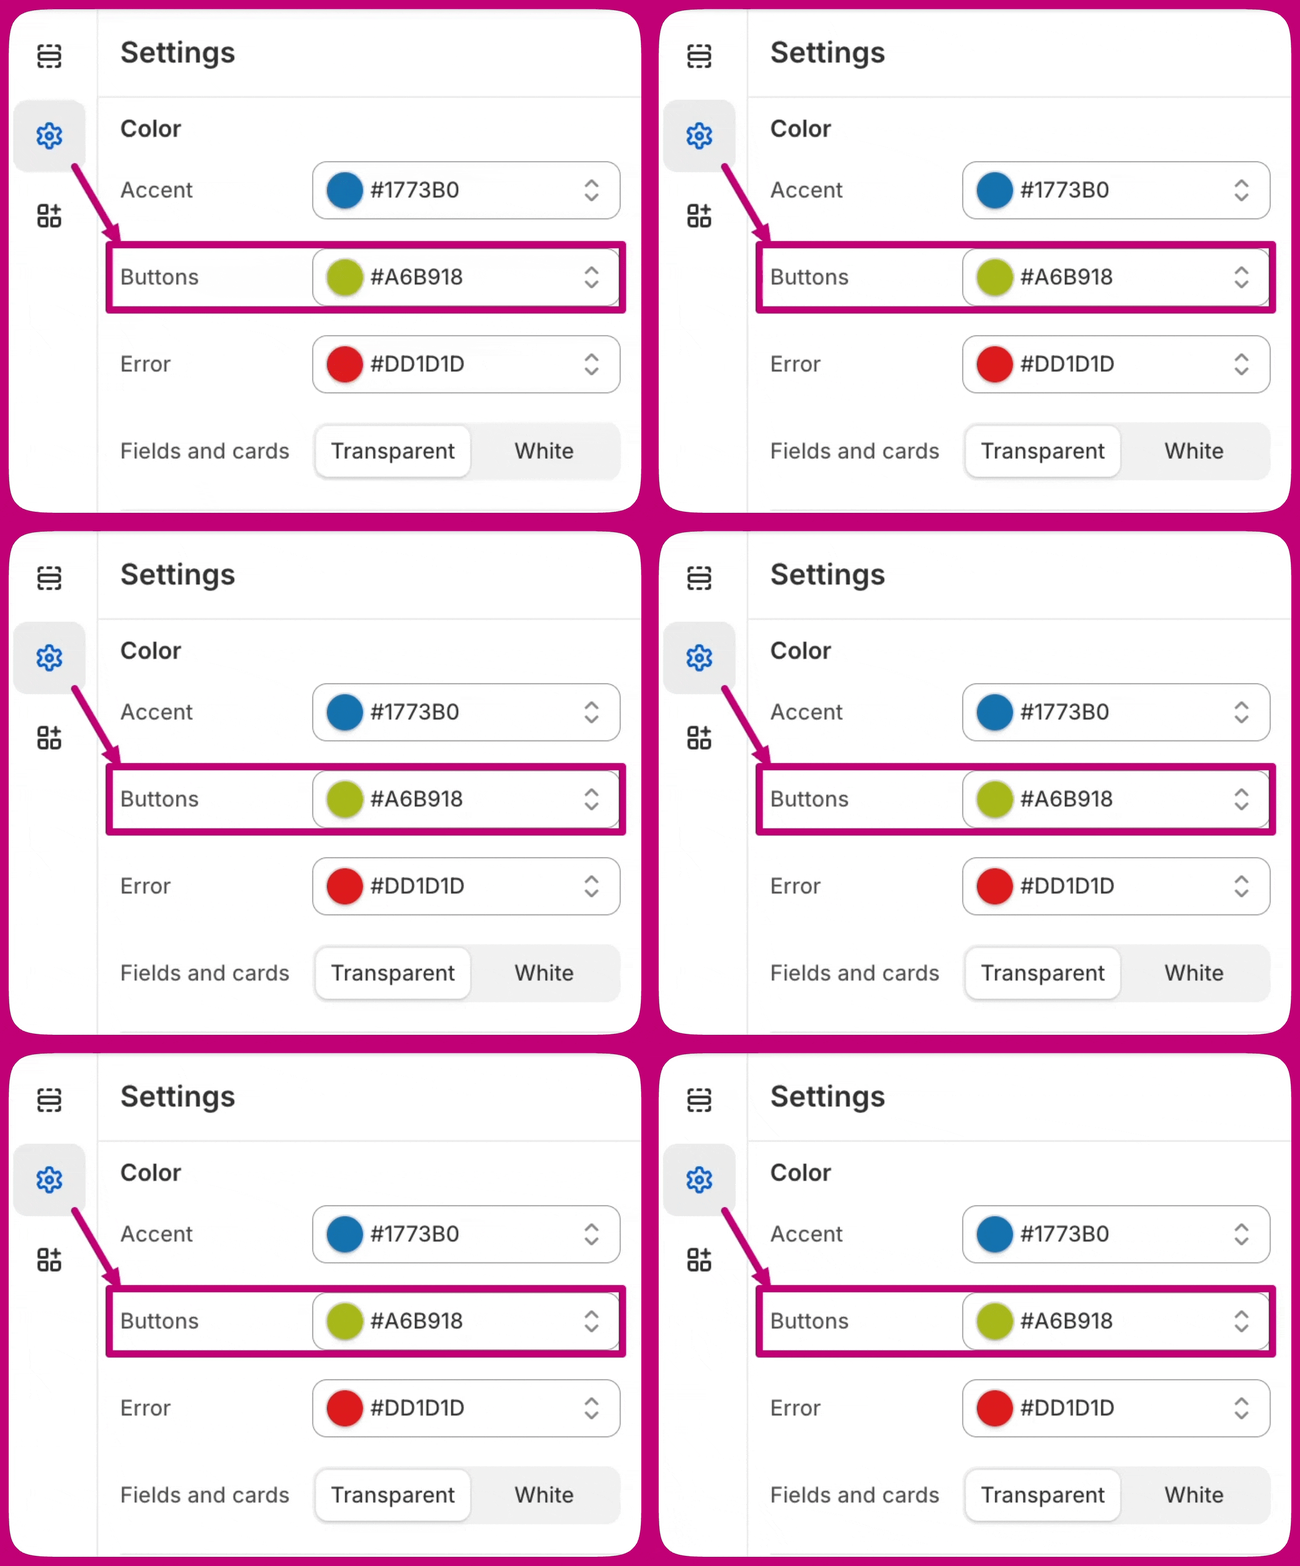
**Colors → Buttons** 是商家最常询问的设置——它控制购后页面上的"Add to order"按钮和下一步按钮:
Checkout 编辑器中不会显示购后页面,因此那里没有可预览的内容。但你的品牌样式仍会应用到该页面。
**Colors → Buttons** 是商家最常询问的设置——它控制购后页面上的"Add to order"按钮和下一步按钮:
## 如果你在 Shopify Plus 上
直接在 Aftersell 的 **Settings → Checkout branding** 中编辑你的品牌样式。你的修改会直接写入 Shopify checkout 品牌样式,因此会应用到你的 checkout、购后、感谢页和订单状态页。另请参见 [Checkout 品牌样式设置](https://docs.aftersell.com/aftersell/checkout_branding_settings#checkout-branding-settings)
在这些套餐上,Aftersell 编辑器的预览也会显示你的真实品牌样式,因此无需下单即可查看样式效果。
如果你愿意,也可以改用 Shopify checkout 编辑器。两者写入的是同一套设置,因此只需使用其中一个。
***
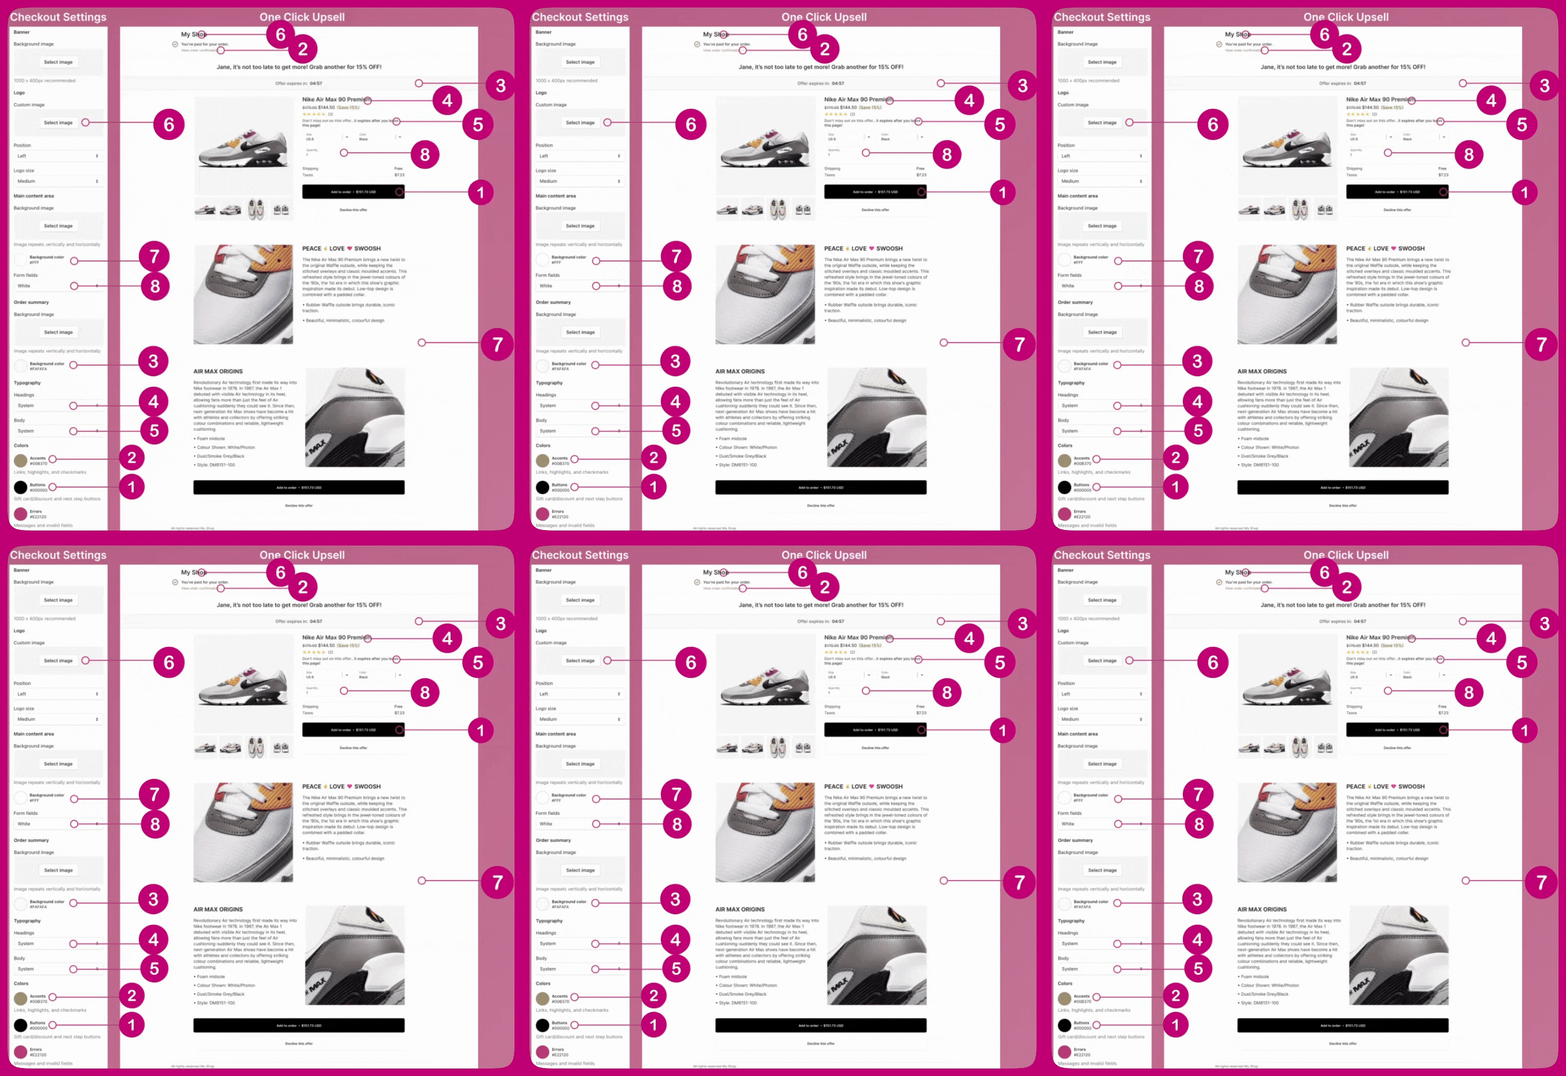
Shopify checkout 编辑器中的许多字段与 Aftersell 的购后页面相关联。下表展示了哪个 Shopify checkout 设置控制购后 upsell 页面上的哪个元素:
| Shopify checkout 设置 | 控制购后页面上的 |
| :--------------------------------------- | :--------------------- |
| **Logo**(图片、位置、大小) | 页面顶部的店铺 logo |
| **Main content area → Background color** | 页面背景 |
| **Order summary → Background color** | Offer 摘要背景 |
| **Typography → Headings** | Offer 和商品标题 |
| **Typography → Body** | 正文文字 |
| **Colors → Accents** | 链接、高亮和对勾标记 |
| **Colors → Buttons** | "Add to order"按钮和下一步按钮 |
| **Form fields** | 款式和数量表单字段 |
例如,Shopify checkout 中的按钮颜色会直接体现在购后页面的按钮颜色上:
 ***
***