> ## Documentation Index
> Fetch the complete documentation index at: https://docs.aftersell.com/llms.txt
> Use this file to discover all available pages before exploring further.

# 创建你的第一个 checkout 小组件

> 指导你在 Aftersell 中设置 checkout 小组件，从选择和创建小组件到自定义其样式和行为。

在本文中，我们将带你完成在 Aftersell 中设置 checkout 小组件的整个过程。要了解可用的不同小组件类型，[点击这里](/zh/aftersell/checkout_widget_types)。

让我们开始吧。

***

<div id="step-1-selecting-your-widget">
  ## 第 1 步：选择你的小组件
</div>

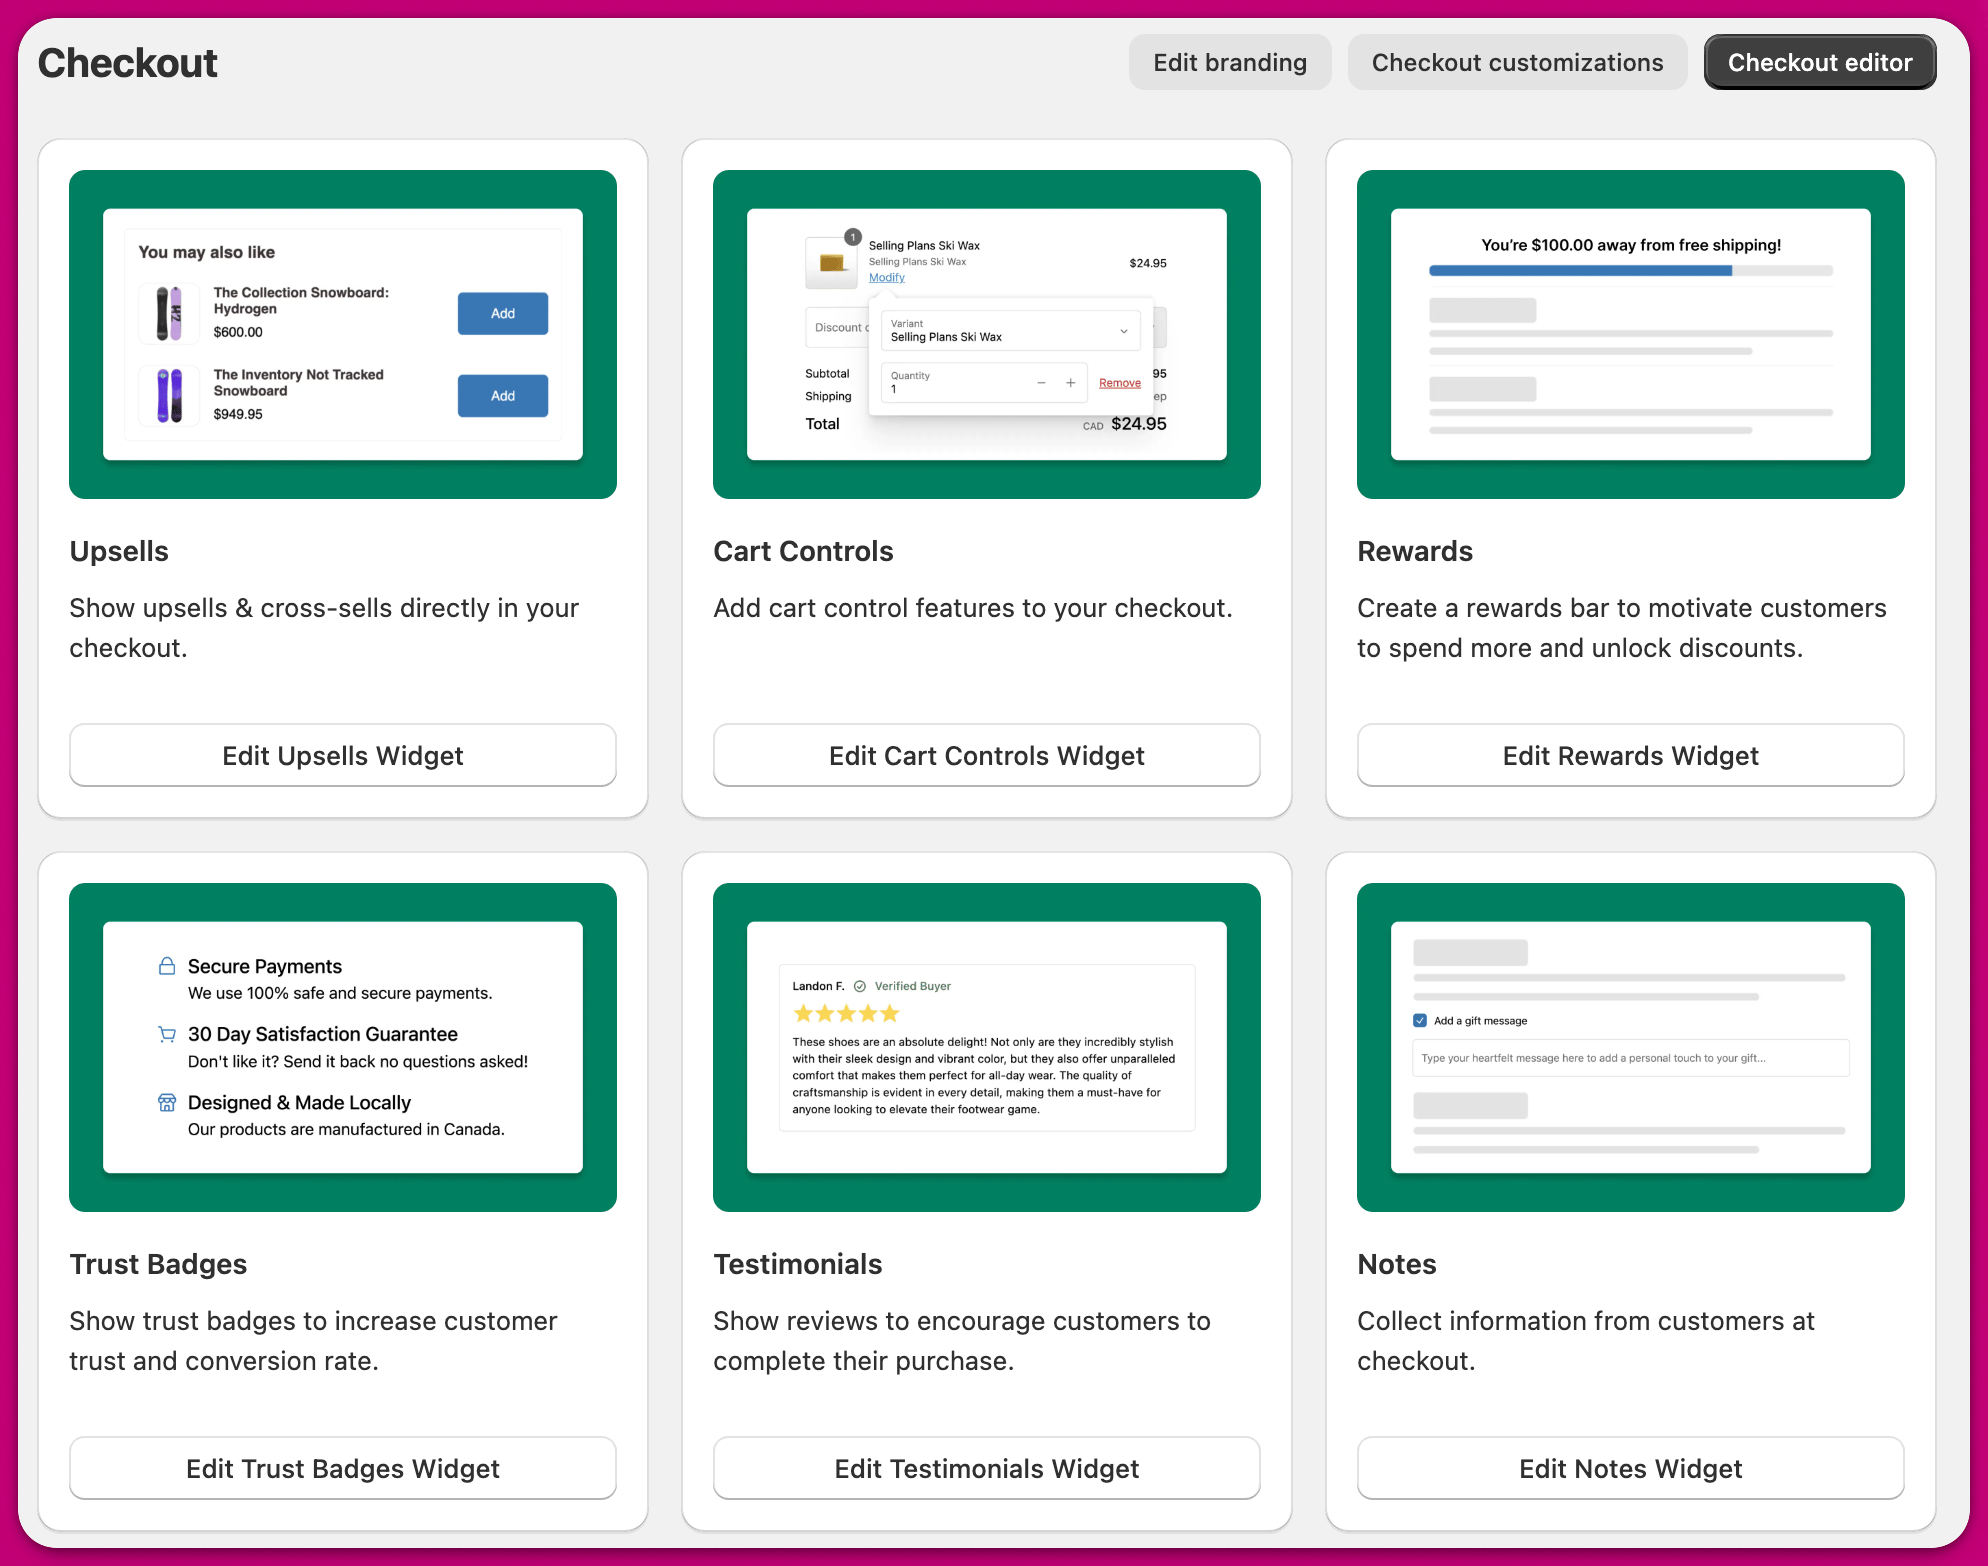
首先，选择符合你需求的小组件。无论是 upsell 小组件还是评价小组件，Aftersell 都提供了多种选择来满足你的偏好。

在本教程中，我们将选择 upsell 小组件。

<img src="https://mintcdn.com/aftersell/1Y3gBpUfxv16VGSW/images/aftersell/checkout-widget-create-cards-upsells-cart-controls.png?fit=max&auto=format&n=1Y3gBpUfxv16VGSW&q=85&s=3302868c50e12461761e6a1300820bd7" alt="Aftersell Checkout 页面显示 Upsells、Cart Controls、Rewards 和 Testimonials 小组件卡片" width="1988" height="1566" data-path="images/aftersell/checkout-widget-create-cards-upsells-cart-controls.png" />

***

<div id="step-2-creating-your-widget">
  ## 第 2 步：创建你的小组件
</div>

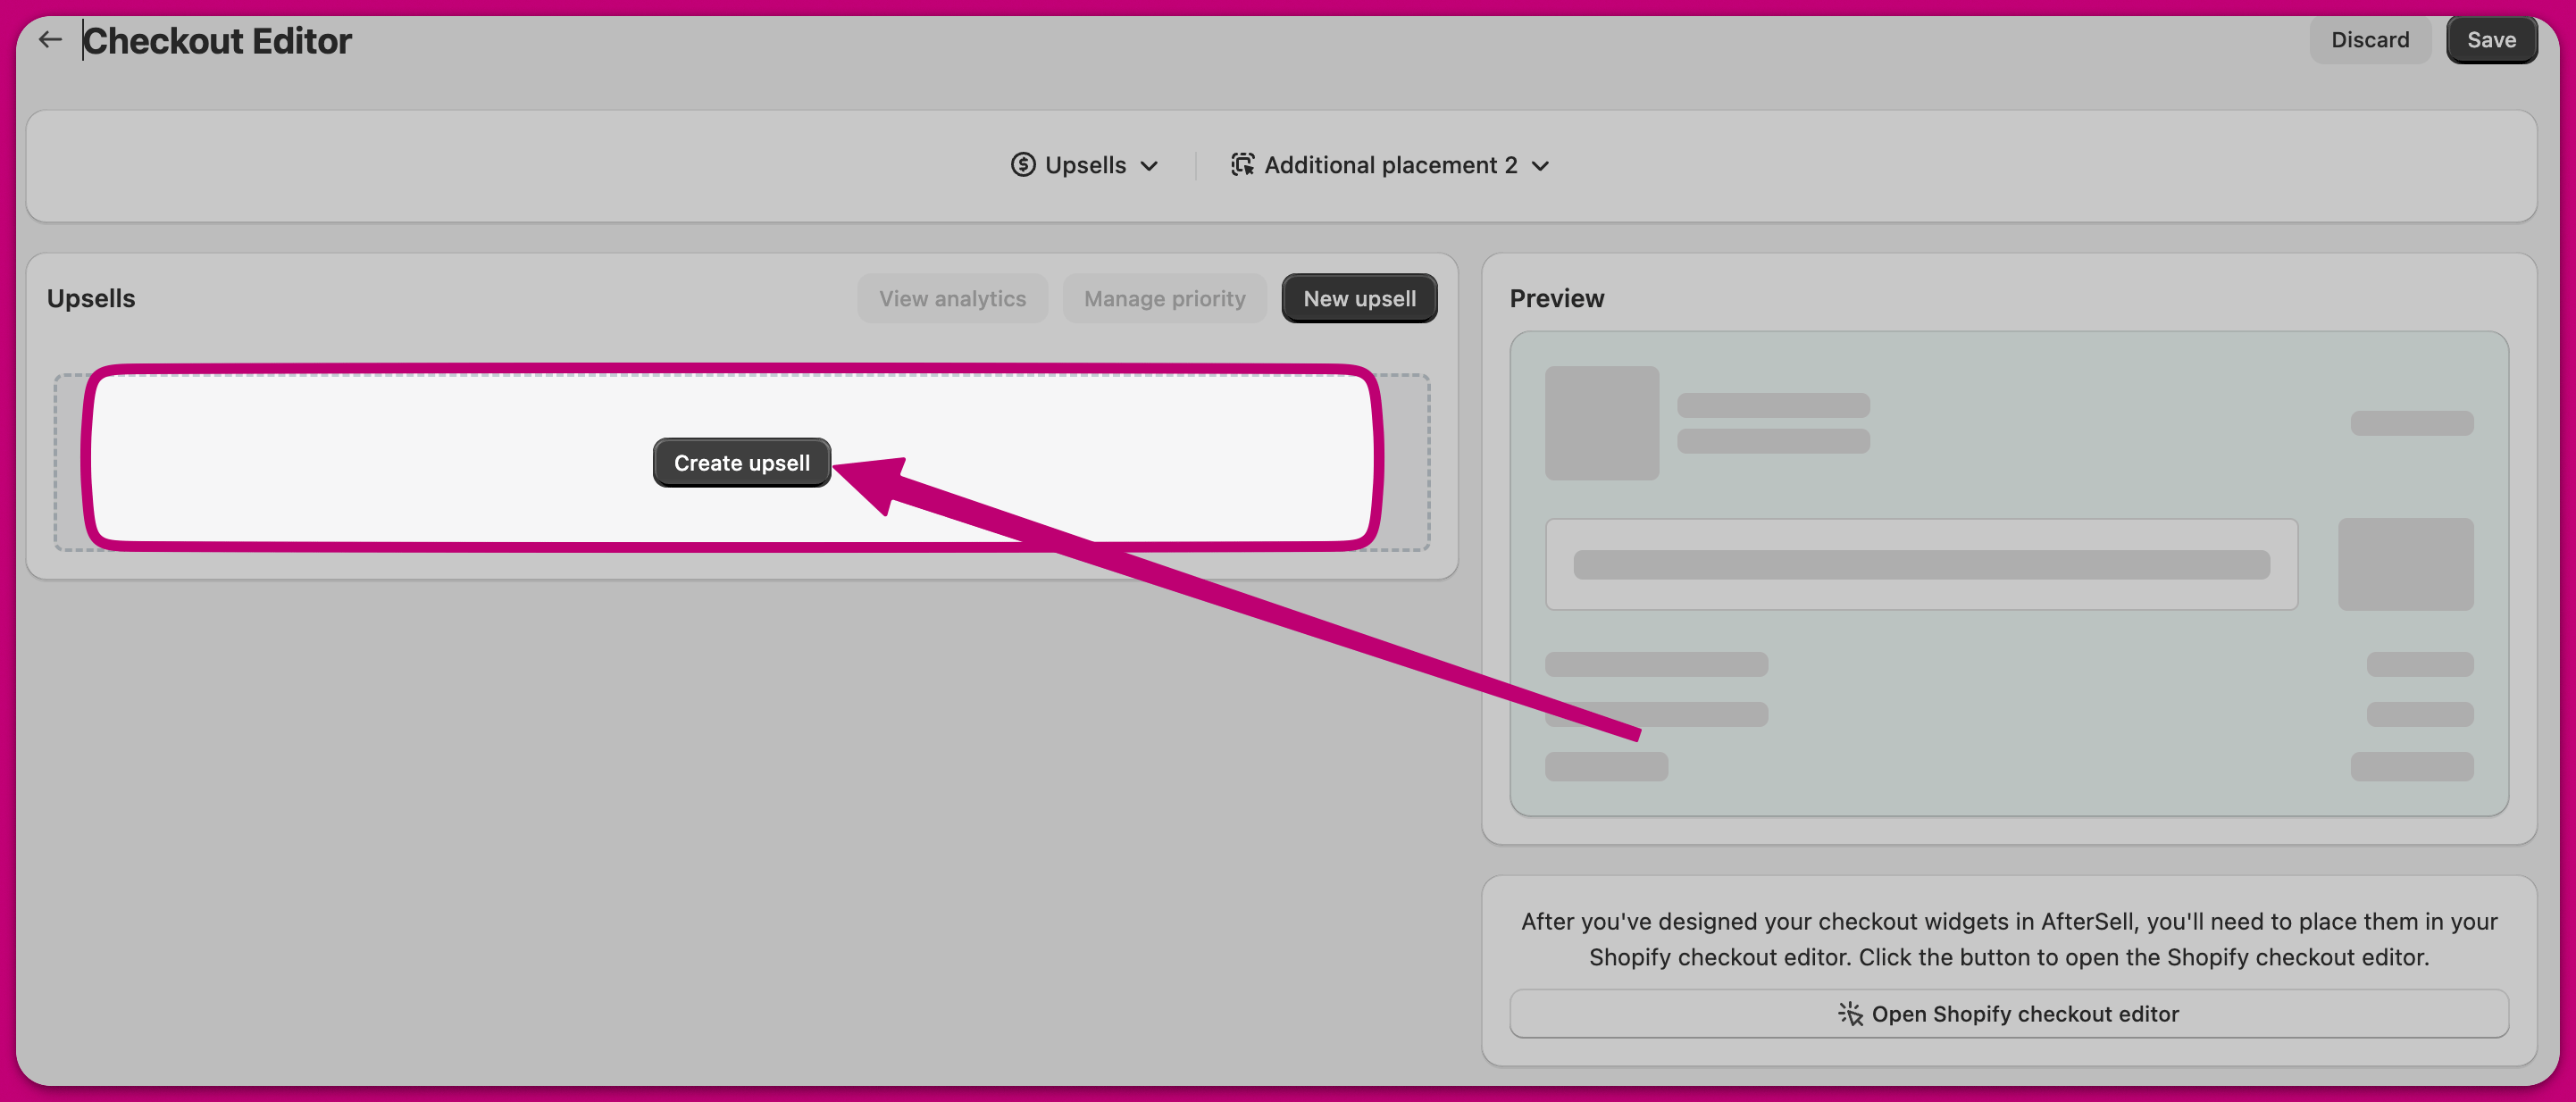
点击"Create Upsell"开始构建你的 upsell 小组件。

<img src="https://mintcdn.com/aftersell/1Y3gBpUfxv16VGSW/images/aftersell/checkout-widget-create-editor-upsells-panel-arrow.png?fit=max&auto=format&n=1Y3gBpUfxv16VGSW&q=85&s=e89c35b59c09c6fd858e910f46d9fcc0" alt="Checkout 编辑器的 Upsells 面板，箭头指向 Create upsell 按钮" width="2884" height="1234" data-path="images/aftersell/checkout-widget-create-editor-upsells-panel-arrow.png" />

***

<div id="step-3-selecting-a-preset">
  ## 第 3 步：选择预设
</div>

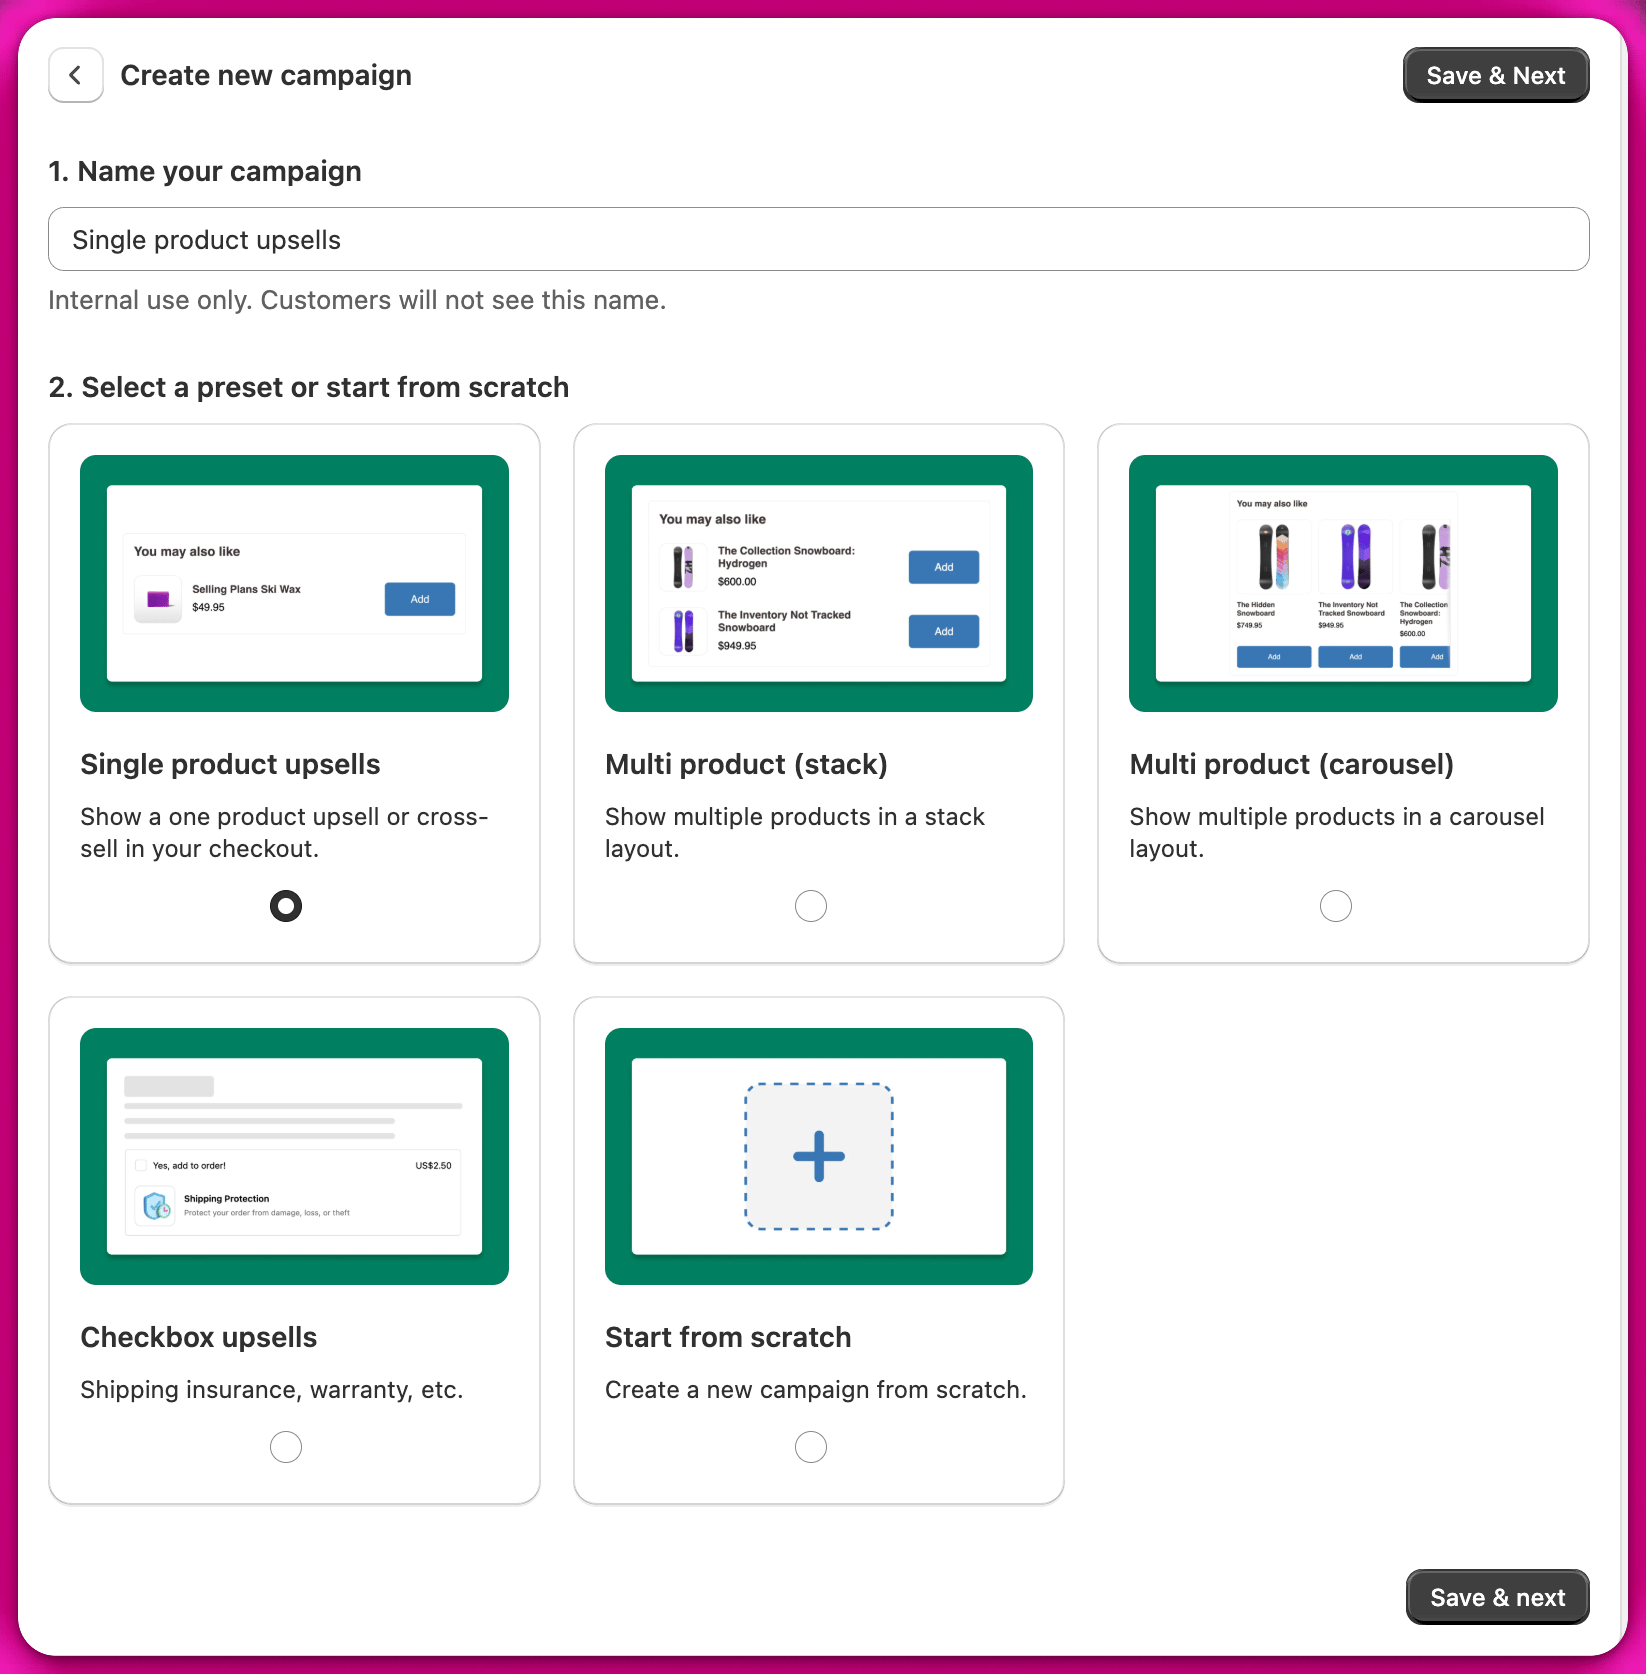
从经过优化的小组件预设列表中进行选择，或者选择从头开始创建。

<img src="https://mintcdn.com/aftersell/1Y3gBpUfxv16VGSW/images/aftersell/checkout-widget-create-new-campaign-preset-options.png?fit=max&auto=format&n=1Y3gBpUfxv16VGSW&q=85&s=d64607da81a3a4b43e9d5c7c9a7420c2" alt="创建新活动页面，显示单产品和多产品 upsell 等预设选项" width="1646" height="1674" data-path="images/aftersell/checkout-widget-create-new-campaign-preset-options.png" />

***

<div id="step-4-edit-styling-and-behaviour">
  ## 第 4 步：编辑样式和行为
</div>

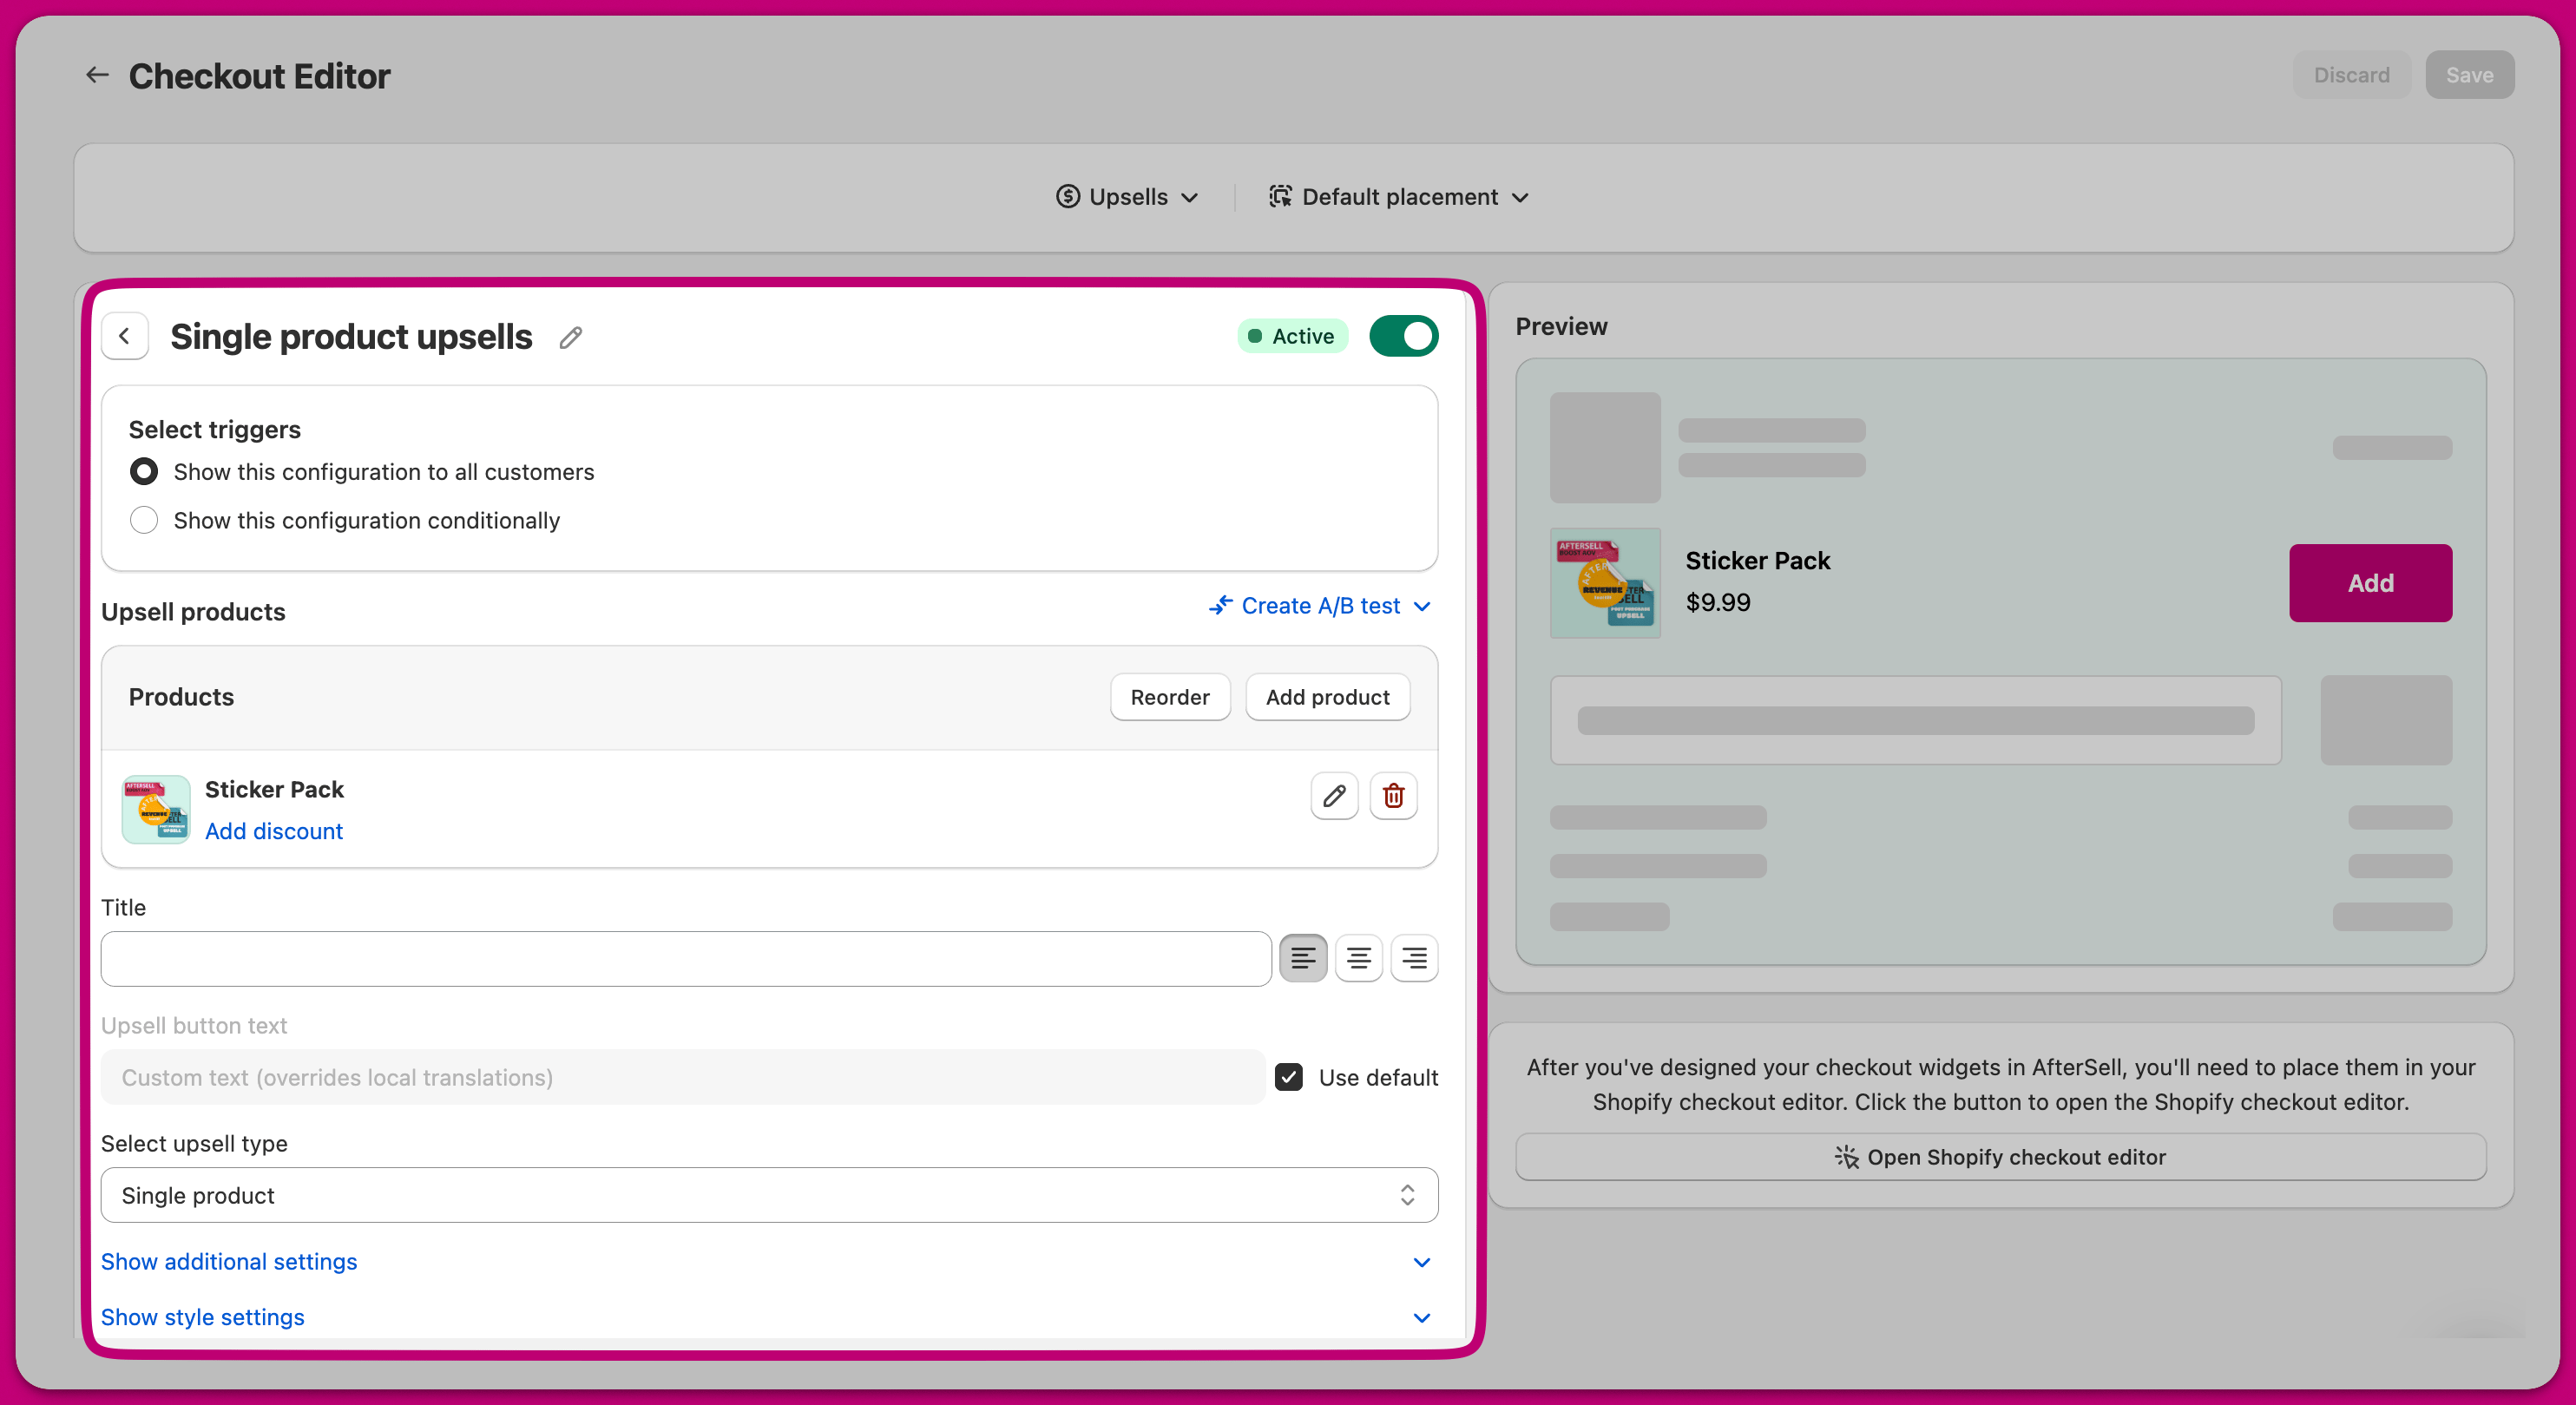
现在是微调细节的时候了。将小组件的样式和行为调整到完美状态。调整触发逻辑、优化产品选择，或为设计添加最后的润色。

<img src="https://mintcdn.com/aftersell/1Y3gBpUfxv16VGSW/images/aftersell/checkout-widget-create-single-product-upsell-editor.png?fit=max&auto=format&n=1Y3gBpUfxv16VGSW&q=85&s=e9560a037ceb877ea2d47d261278934b" alt="单产品 upsell 编辑器显示触发器、产品和样式设置以及实时预览" width="2968" height="1619" data-path="images/aftersell/checkout-widget-create-single-product-upsell-editor.png" />

***

<div id="step-5-enable-widget-status">
  ## 第 5 步：启用小组件状态
</div>

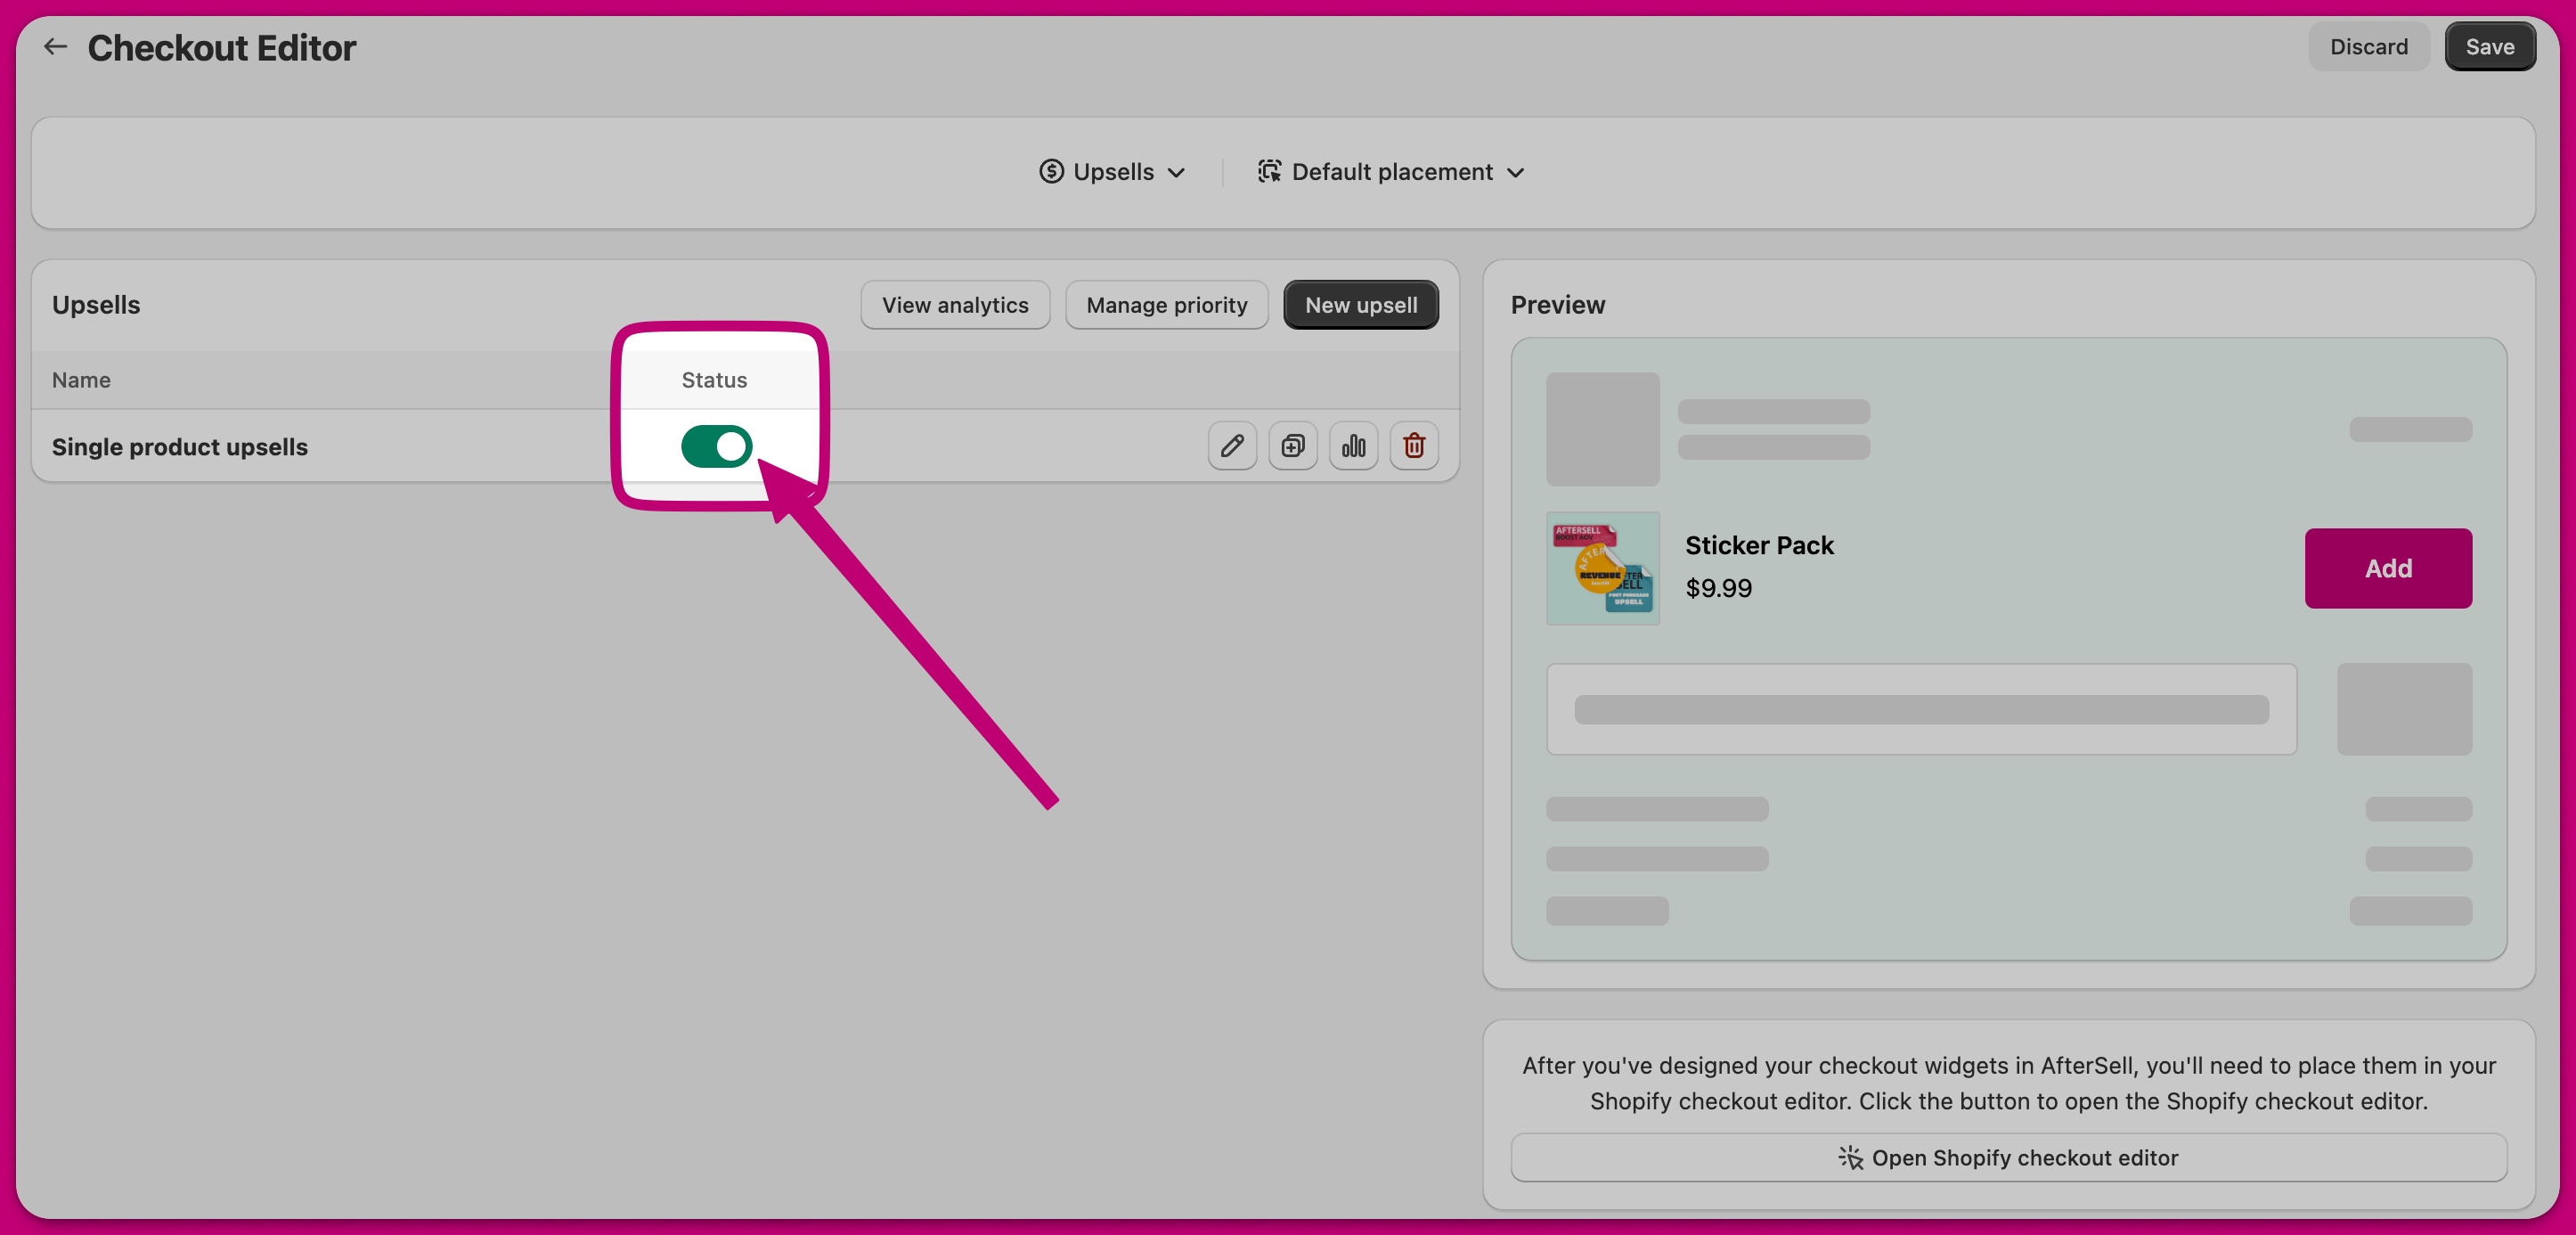
确保你的小组件状态已设置为激活。

<img src="https://mintcdn.com/aftersell/1Y3gBpUfxv16VGSW/images/aftersell/checkout-widget-create-editor-upsell-status-toggle.png?fit=max&auto=format&n=1Y3gBpUfxv16VGSW&q=85&s=7f9cedd5ace808ad47a077090be3e29d" alt="Checkout 编辑器中 upsell 状态开关已打开以激活小组件" width="2892" height="1386" data-path="images/aftersell/checkout-widget-create-editor-upsell-status-toggle.png" />

现在你的 checkout 小组件已在 Aftersell 中上线，还剩最后一步：将小组件放置到你的 Shopify checkout 中。想了解如何操作？点击下方深入了解该过程。

[了解更多](/zh/aftersell/adding_a_checkout_widget_to_your_shopify_checkout)