> ## Documentation Index
> Fetch the complete documentation index at: https://docs.aftersell.com/llms.txt
> Use this file to discover all available pages before exploring further.

# Adding Code to Your Shopify Theme for Accelerated Checkout Buttons

> This article explains how to place the required code so express checkout buttons display in the Upcart footer.

## Overview

This guide will walk you through the steps to modify your Shopify theme's code to ensure that Accelerated Checkout buttons work seamlessly in Upcarts updated Express Payment Module.

Before proceeding, we recommend familiarizing yourself with [Shopify's official documentation](https://help.shopify.com/en/manual/online-store/themes/theme-structure/extend/edit-theme-code) on how to edit your theme code. This will help you navigate the code editor smoothly. In addition, the documentation will highlight some of the risks of editing theme code.

***

## Step 1: Access Your Theme Code

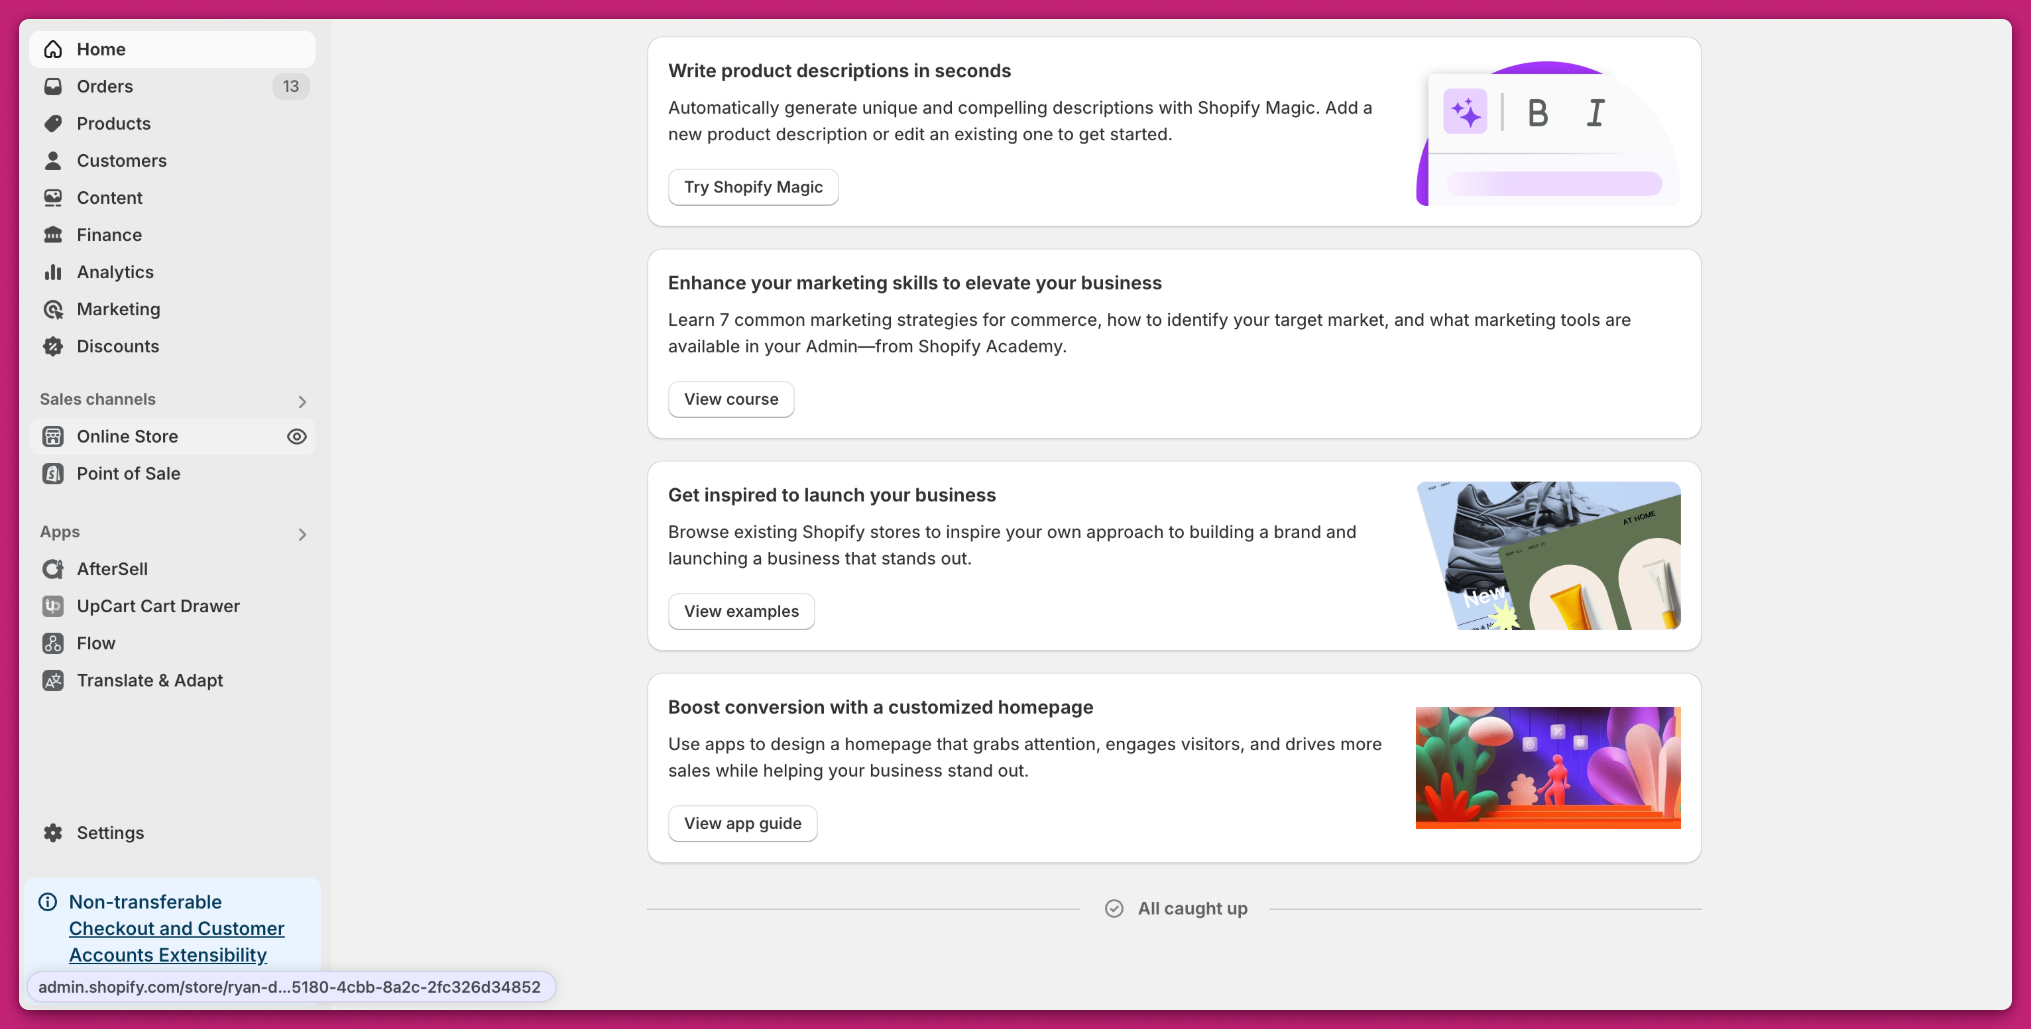
1. **Open the Shopify Admin Dashboard**\
   From your Shopify dashboard, go to **Online Store** > **Themes**.

   <img src="https://mintcdn.com/aftersell/djWVMMNjpCIkZ6mp/images/upcart/edf6dcce8f72.png?fit=max&auto=format&n=djWVMMNjpCIkZ6mp&q=85&s=655bb49897ef261bcde043a868a41200" alt="Image" width="2031" height="1029" data-path="images/upcart/edf6dcce8f72.png" />

2. **Open the Code Editor**\
   Next, click on **Actions** for your current theme, then select **Edit Code**.
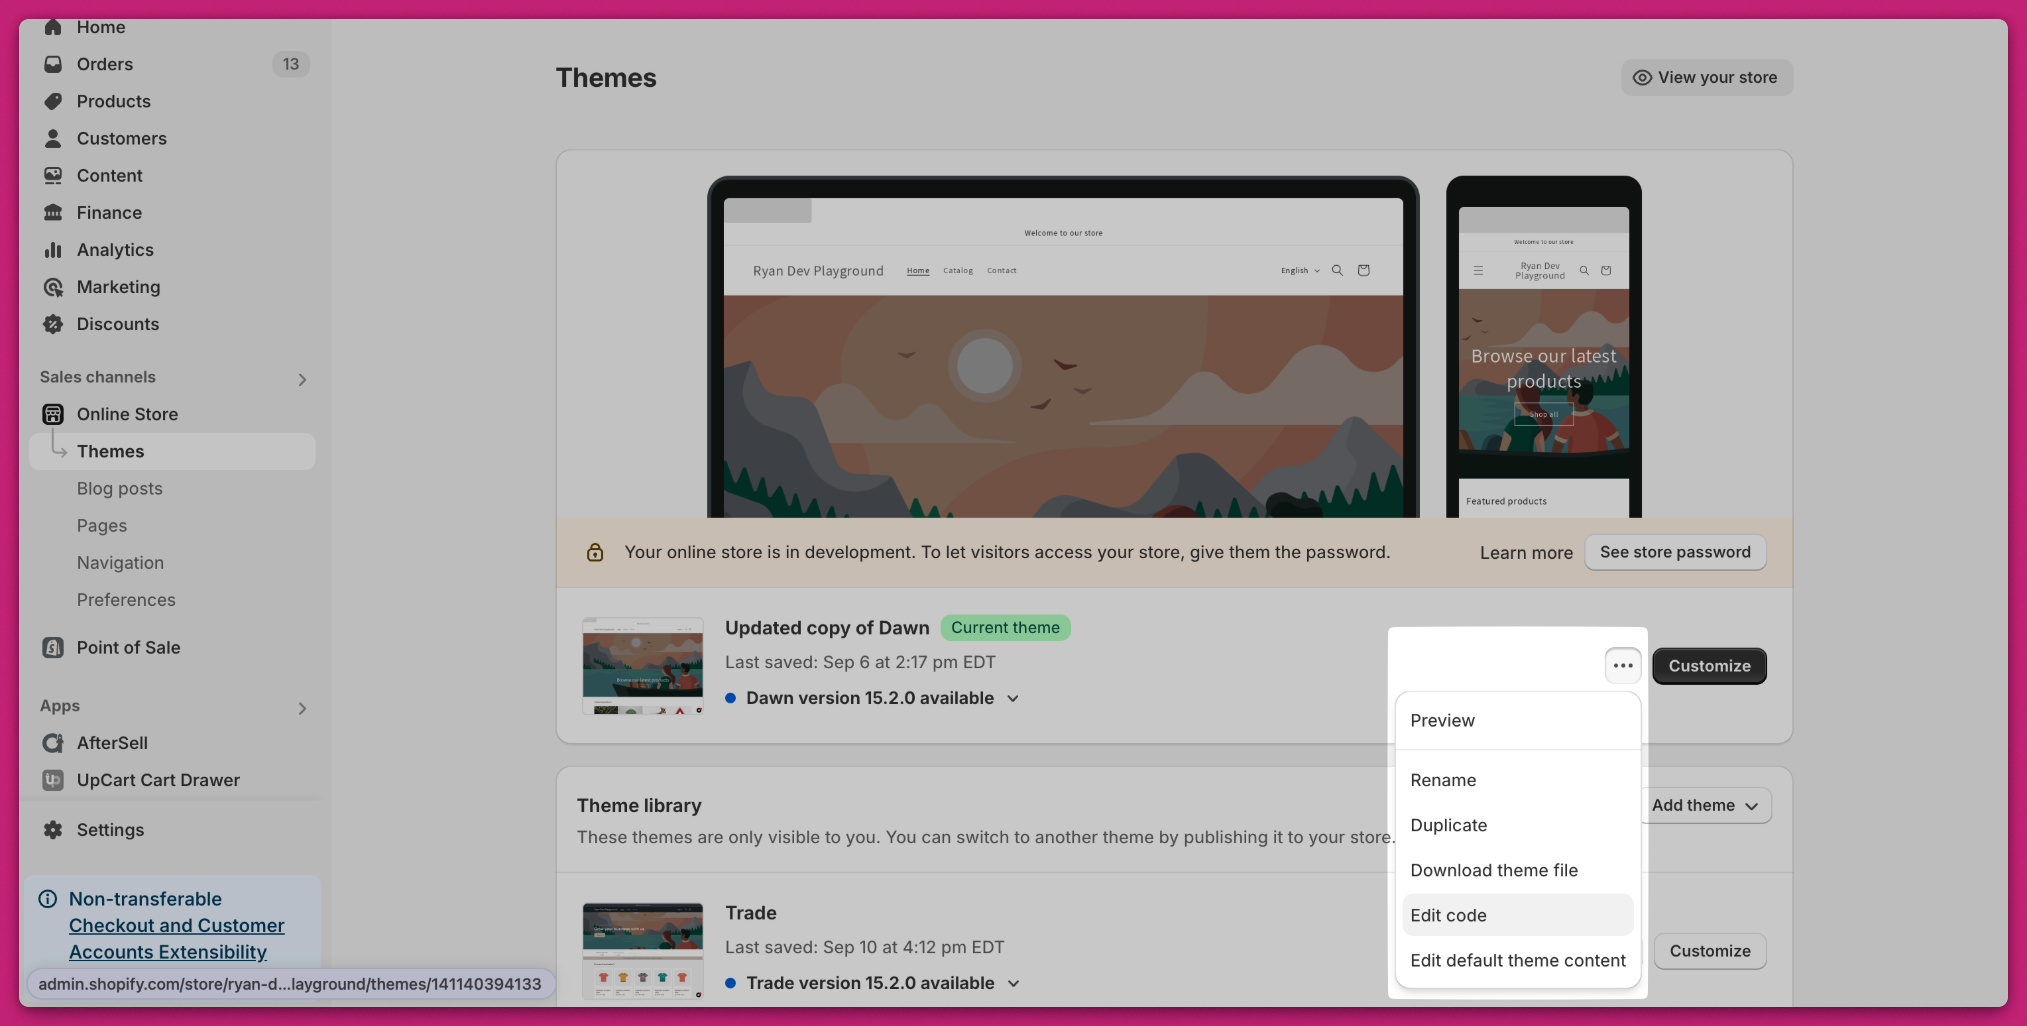
   <img src="https://mintcdn.com/aftersell/44S6gABa85nCHEE3/images/upcart/133eb08ada42.png?fit=max&auto=format&n=44S6gABa85nCHEE3&q=85&s=997b06e55037592262043e43b806ecbf" alt="Image" width="2027" height="1026" data-path="images/upcart/133eb08ada42.png" />

## Step 2: Open the Layout Folder

1. In the code editor, locate the **layout** folder on the left sidebar.
2. Find and open a file called **theme.liquid**.
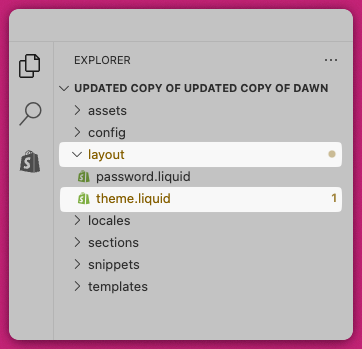
   <img src="https://mintcdn.com/aftersell/djWVMMNjpCIkZ6mp/images/upcart/eb36206e9716.png?fit=max&auto=format&n=djWVMMNjpCIkZ6mp&q=85&s=3787f3e1732608b2790b2dd56c22d6ec" alt="Image" width="400" data-path="images/upcart/eb36206e9716.png" />

## Step 3: Locate the `<body>` Tag

1. In the **theme.liquid** file, search for the line that contains `<body`.\
   This is typically near the middle of the file. An easy way to find it is to search using (Command or Ctrl) + F and look for `<body`.

   <img src="https://mintcdn.com/aftersell/44S6gABa85nCHEE3/images/upcart/27d47f6343fc.png?fit=max&auto=format&n=44S6gABa85nCHEE3&q=85&s=faf2613a039c822496349f881f2beb3d" alt="Image" width="684" height="417" data-path="images/upcart/27d47f6343fc.png" />

## Step 4: Add the Code

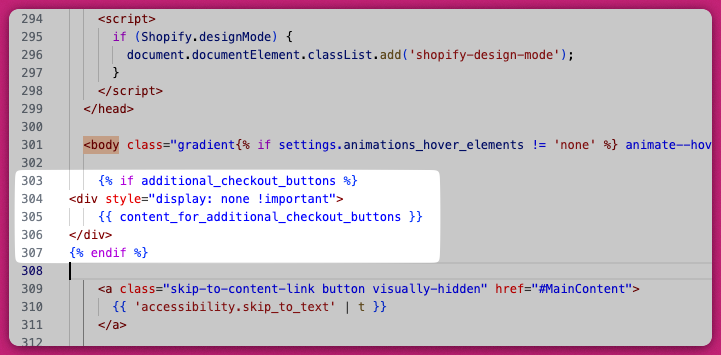
1. Directly below the line with `<body>`, add the following code:

   ```
   {% if additional_checkout_buttons %}  
   <div style="display: none !important">  
       {{ content_for_additional_checkout_buttons }}  
   </div>  
   {% endif %}
   ```

   <img src="https://mintcdn.com/aftersell/-dxnKm0Mro2whB9j/images/upcart/9a5f383e349b.png?fit=max&auto=format&n=-dxnKm0Mro2whB9j&q=85&s=00aff62db2dffa8c70b4a784d7f18580" alt="Image" width="721" height="355" data-path="images/upcart/9a5f383e349b.png" />
2. Save the changes.

***

## Step 5: Test Your Changes

Go to your storefront and check the functionality of the Accelerated Checkout buttons. Ensure that everything displays and works as expected while the module is updated and enabled.
