> ## Documentation Index
> Fetch the complete documentation index at: https://docs.aftersell.com/llms.txt
> Use this file to discover all available pages before exploring further.

# Upcart 빠른 시작 가이드

> Upcart를 활성화하고 핵심 기능을 사용 설정하며 카트 드로어를 라이브로 게시하는 방법을 알아보세요.

이 가이드는 시각적 커스터마이징부터 스토어프론트 활성화까지, Upcart와 주요 모듈을 설정하는 과정을 안내해요.

Upcart는 테마 카트 드로어를 시각적으로 대체하지만, **테마의 카트 드로어나 카트 페이지와 통합되지는 않아요**. Shopify 카트 페이지는 계속 접근할 수 있어요.

<div id="managing-modules">
  # **모듈 관리하기**
</div>

각 Upcart 모듈은 **쉽게 활성화하거나 비활성화할 수 있어요**. 오른쪽 상단의 **Enable/Disable** 버튼을 클릭하기만 하면 언제든지 모듈을 켜거나 끌 수 있어요. 변경 사항은 저장하는 즉시 적용돼요.

<img src="https://mintcdn.com/aftersell/uVGuDiyXpd6WOLO4/images/upcart/quickstart-announcements-module-row-disabled.png?fit=max&auto=format&n=uVGuDiyXpd6WOLO4&q=85&s=454a834d8ea953a99ba987dfdb80499a" alt="Disabled로 표시된 Announcements 모듈 행과 Enable 버튼을 가리키는 화살표" width="1548" height="210" data-path="images/upcart/quickstart-announcements-module-row-disabled.png" />

<div id="cart-design">
  # 카트 디자인
</div>

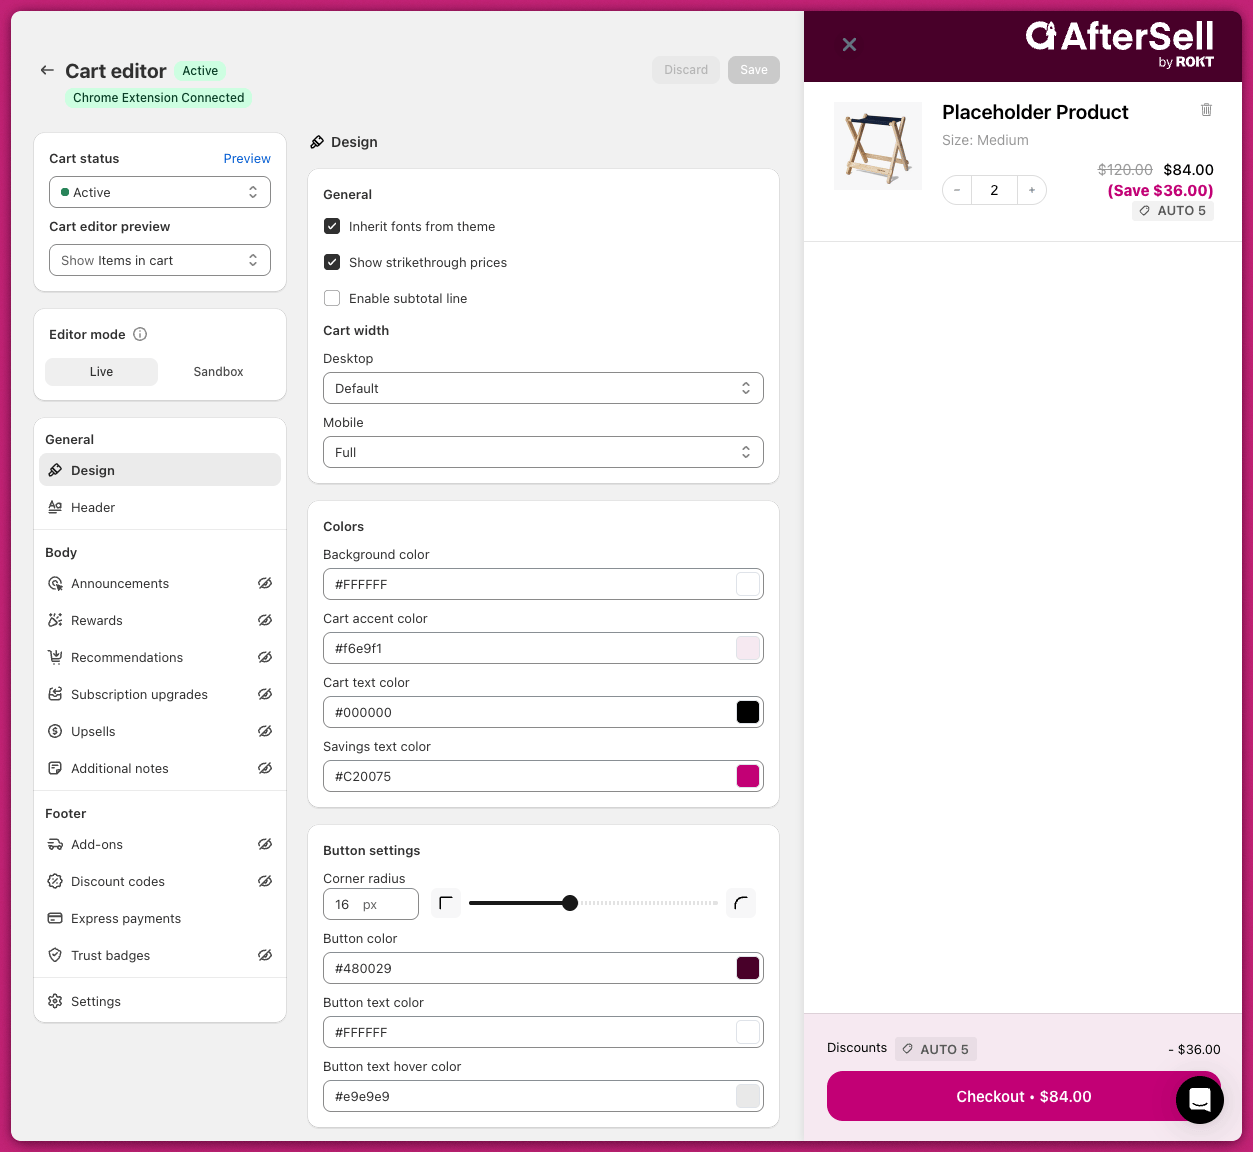
Upcart의 Cart Editor를 처음 열면 [Design 모듈](/ko/upcart/design_module)로 이동해요. 여기에서 드로어의 기본 색상을 스토어 브랜딩에 맞게 커스터마이징할 수 있어요.
<img src="https://mintcdn.com/aftersell/uVGuDiyXpd6WOLO4/images/upcart/quickstart-cart-editor-design-module.png?fit=max&auto=format&n=uVGuDiyXpd6WOLO4&q=85&s=e15c4d0893916f9200cf1884c1d0adfe" alt="라이브 카트 드로어 미리보기 옆에 색상 설정이 있는 Upcart Cart Editor Design 모듈" width="600" data-path="images/upcart/quickstart-cart-editor-design-module.png" />

<div id="announcements">
  # 공지
</div>

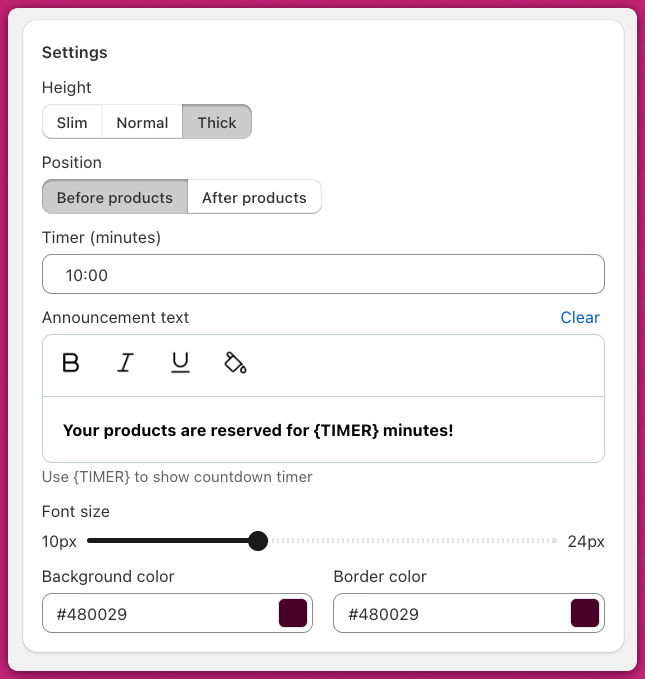
카트 메시지나 카운트다운 타이머를 표시하려면 \*\*Body > [Announcements](/ko/upcart/announcements_module)\*\*로 이동하세요.

오른쪽 상단에서 **Enable**을 클릭하세요. 모듈 이름 옆의 배지가 **Disabled**에서 **Active**로 바뀌어요.

**Announcement Text** 필드에 메시지를 입력하고 필요하면 타이머를 설정하세요.
<img src="https://mintcdn.com/aftersell/uVGuDiyXpd6WOLO4/images/upcart/quickstart-announcement-settings-timer-text.png?fit=max&auto=format&n=uVGuDiyXpd6WOLO4&q=85&s=2a726b39f6ea92d5899e2aae2968c2d1" alt="타이머, 공지 텍스트 필드, 색상 옵션이 있는 공지 설정" width="645" height="679" data-path="images/upcart/quickstart-announcement-settings-timer-text.png" />

카운트다운이 올바르게 작동하도록 공지 텍스트 안에 `{TIMER}` 변수를 사용하세요(예: "This offer is only available for {TIMER}."). 서드파티 도구에서 서식이 적용된 텍스트를 그대로 복사하는 것은 피하세요.

완료한 후에는 오른쪽 상단의 **Save**를 꼭 클릭하세요.

<div id="theme-level-issues">
  #### 테마 수준 문제
</div>

* **CSS 또는 앱 충돌:** `display: none;` 같은 CSS 속성이 공지 바를 숨기고 있지 않은지 확인하세요. 또한 서드파티 앱이 이 설정을 덮어쓰고 있지 않은지 확인하세요.
* **텍스트 가시성:** 공지 바 텍스트 색상이 배경과 대비를 이루는지 확인하고, 필요하면 테마 설정에서 조정하세요.

<div id="advanced-debugging-steps">
  #### 고급 디버깅 단계
</div>

문제가 지속되면 공지 바에 영향을 주는 스크립트 문제가 있는지 브라우저 콘솔 오류를 확인하고, 충돌 원인을 찾기 위해 서드파티 앱을 일시적으로 비활성화해 보세요.

<div id="rewards">
  # 리워드
</div>

고객이 더 많이 지출하도록 유도하는 진행 바를 표시하려면 Rewards 모듈을 활성화하세요.

<div id="general-settings">
  ### **일반 설정**
</div>

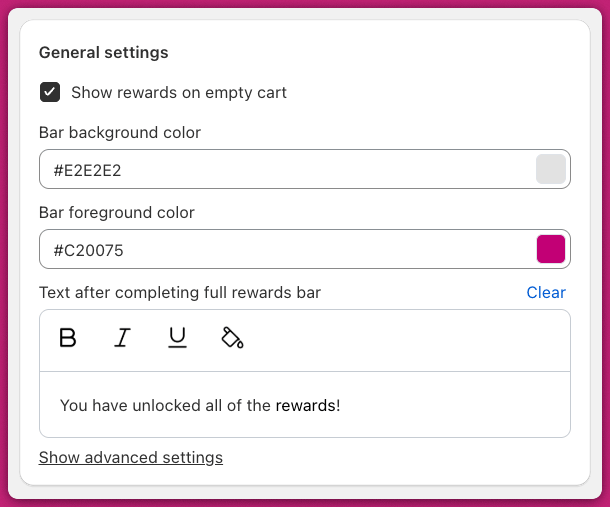
브랜딩 색상과 마지막 리워드 티어 달성 후 표시되는 메시지를 설정하세요.

General settings 아래의 **Rewards calculation** 카드에서 리워드 기준을 선택하세요:

* **Cart total (\$)**: 카트 총액을 기준으로 추적해요
* **Cart quantity (#)**: 상품 수량을 기준으로 추적해요
<img src="https://mintcdn.com/aftersell/uVGuDiyXpd6WOLO4/images/upcart/quickstart-rewards-module-general-settings.png?fit=max&auto=format&n=uVGuDiyXpd6WOLO4&q=85&s=d702c06541f1304d2d2e742f79d62140" alt="바 색상과 완료 메시지 필드가 있는 Rewards 모듈 General settings" width="600" data-path="images/upcart/quickstart-rewards-module-general-settings.png" />

<div id="tier-settings">
  ### **티어 설정**
</div>

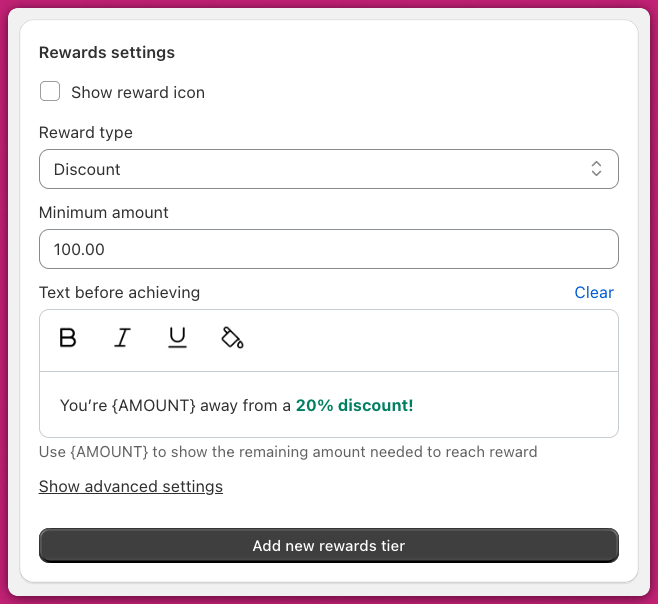
리워드 유형을 선택하세요:

* [**Shipping**](https://help.shopify.com/en/manual/fulfillment/setup/shipping-rates/flat-shipping-rates): 해당 티어에서 무료 배송을 잠금 해제해요
* [**Discount**](https://help.shopify.com/en/manual/discounts/discount-types): 해당 티어에서 할인을 잠금 해제해요
* [**Product**](/ko/upcart/set_up_a_free_product_reward_tier_in_upcart): 카트에 상품을 추가해요

티어 진행률을 할인 전 기준으로 측정할지 할인 후 기준으로 측정할지는 **Rewards calculation**의 **Use pre-discounted prices for cart total** 체크박스로 전체 바에 대해 한 번만 설정하며, 리워드 유형의 속성이 아니에요.

리워드를 트리거할 최소 기준값을 설정하고 **Title before achieving tier** 필드를 커스터마이징하세요. 리워드 티어는 최대 **4개**까지 만들 수 있어요.
<img src="https://mintcdn.com/aftersell/uVGuDiyXpd6WOLO4/images/upcart/quickstart-rewards-settings-reward-type.png?fit=max&auto=format&n=uVGuDiyXpd6WOLO4&q=85&s=2085093e9f85cdd42ed163fab7d726db" alt="리워드 유형 선택, 최소 금액, 티어 제목 필드가 있는 Tier settings" width="600" data-path="images/upcart/quickstart-rewards-settings-reward-type.png" />

<Note>
  이 스크린샷은 현재 레이블 이전의 화면이에요. 섹션이 "Rewards settings"로, 필드가 "Text before achieving"으로 표시되어 있어요. 컨트롤 자체는 동일하며, 지금은 **Tier settings**와 **Title before achieving tier**로 표시돼요.
</Note>

<div id="upsells">
  # 업셀
</div>

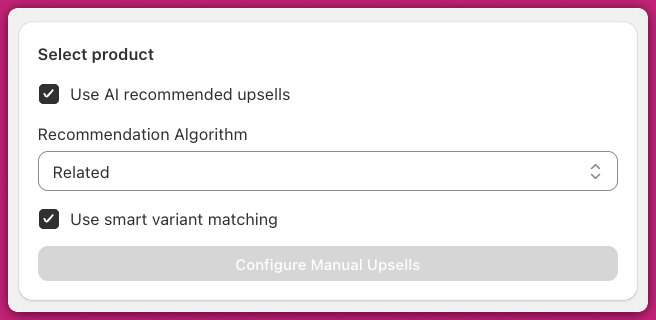
**Use AI Recommended Upsells**를 활성화하고 **Related** 알고리즘을 선택한 다음, 카트 내용을 기반으로 일치하는 상품 옵션(variant)을 미리 선택하도록 **Smart Variant Matching**을 켜세요.
<img src="https://mintcdn.com/aftersell/uVGuDiyXpd6WOLO4/images/upcart/quickstart-upsells-settings-ai-recommended.png?fit=max&auto=format&n=uVGuDiyXpd6WOLO4&q=85&s=65cddd8e07bfe9e9805ce76e43377ab3" alt="AI 추천 업셀, Related 알고리즘, 스마트 옵션 매칭이 활성화된 Upsells 설정" width="600" data-path="images/upcart/quickstart-upsells-settings-ai-recommended.png" />

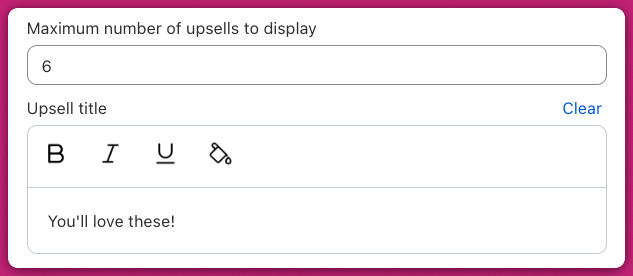
섹션 제목과 **Add** 버튼 레이블을 커스터마이징하세요.

<img src="https://mintcdn.com/aftersell/uVGuDiyXpd6WOLO4/images/upcart/quickstart-upsell-fields-maximum-upsells.png?fit=max&auto=format&n=uVGuDiyXpd6WOLO4&q=85&s=58ad7bd0311baa003f3ea5dae376505d" alt="표시할 최대 업셀 수와 섹션 제목 텍스트를 위한 Upsell 필드" width="600" data-path="images/upcart/quickstart-upsell-fields-maximum-upsells.png" />

<div id="add-ons">
  # 애드온
</div>

푸터에 토글 방식의 애드온을 표시하려면 다음 옵션 중 하나를 활성화할 수 있어요:

<div id="shipping-protection">
  ### **배송 보호**
</div>

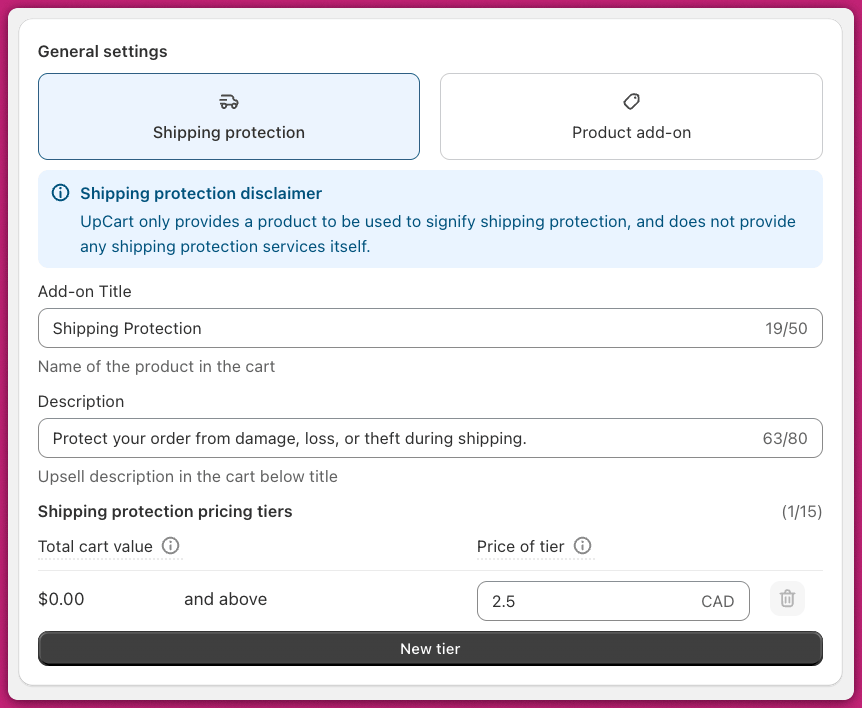
**Shipping Protection**을 선택하고 카트 금액에 따른 동적 가격 티어를 설정하세요.\
이렇게 하면 Shopify 카탈로그에 실제 상품이 생성돼요.
<img src="https://mintcdn.com/aftersell/uVGuDiyXpd6WOLO4/images/upcart/quickstart-shipping-protection-add-settings.png?fit=max&auto=format&n=uVGuDiyXpd6WOLO4&q=85&s=a8432cf06443d21b7c341a0942ef7d7e" alt="제목, 설명, 가격 티어가 있는 Shipping Protection 애드온 설정" width="862" height="708" data-path="images/upcart/quickstart-shipping-protection-add-settings.png" />

<div id="product-add-on">
  ### **상품 애드온**
</div>

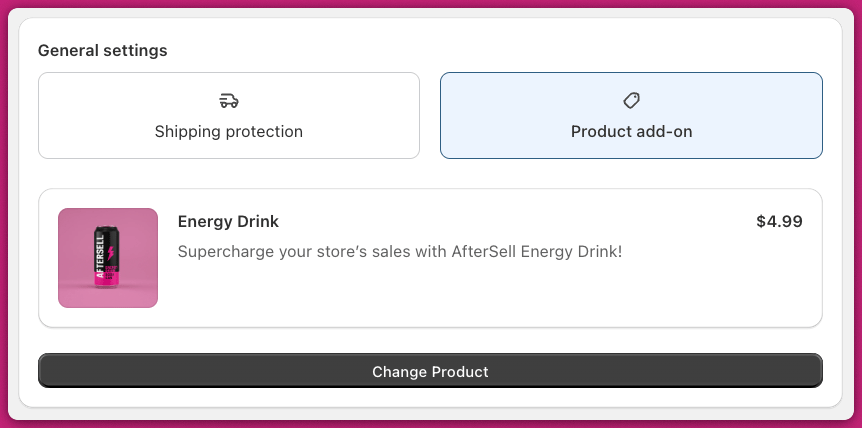
**Product Add-On** 탭으로 전환한 다음 업셀로 제공할 기존 상품을 선택하세요.
<img src="https://mintcdn.com/aftersell/uVGuDiyXpd6WOLO4/images/upcart/quickstart-product-add-on-energy-drink.png?fit=max&auto=format&n=uVGuDiyXpd6WOLO4&q=85&s=d7eaf37fa102b147636bfae244fef54c" alt="Energy Drink 상품이 선택되어 있고 Change Product 버튼이 있는 Product add-on 탭" width="862" height="428" data-path="images/upcart/quickstart-product-add-on-energy-drink.png" />

<div id="activating-upcart-on-your-store">
  # 스토어에서 Upcart 활성화하기
</div>

<div id="step-one-make-your-cart-live">
  ### 1단계: 카트를 라이브로 만들기
</div>

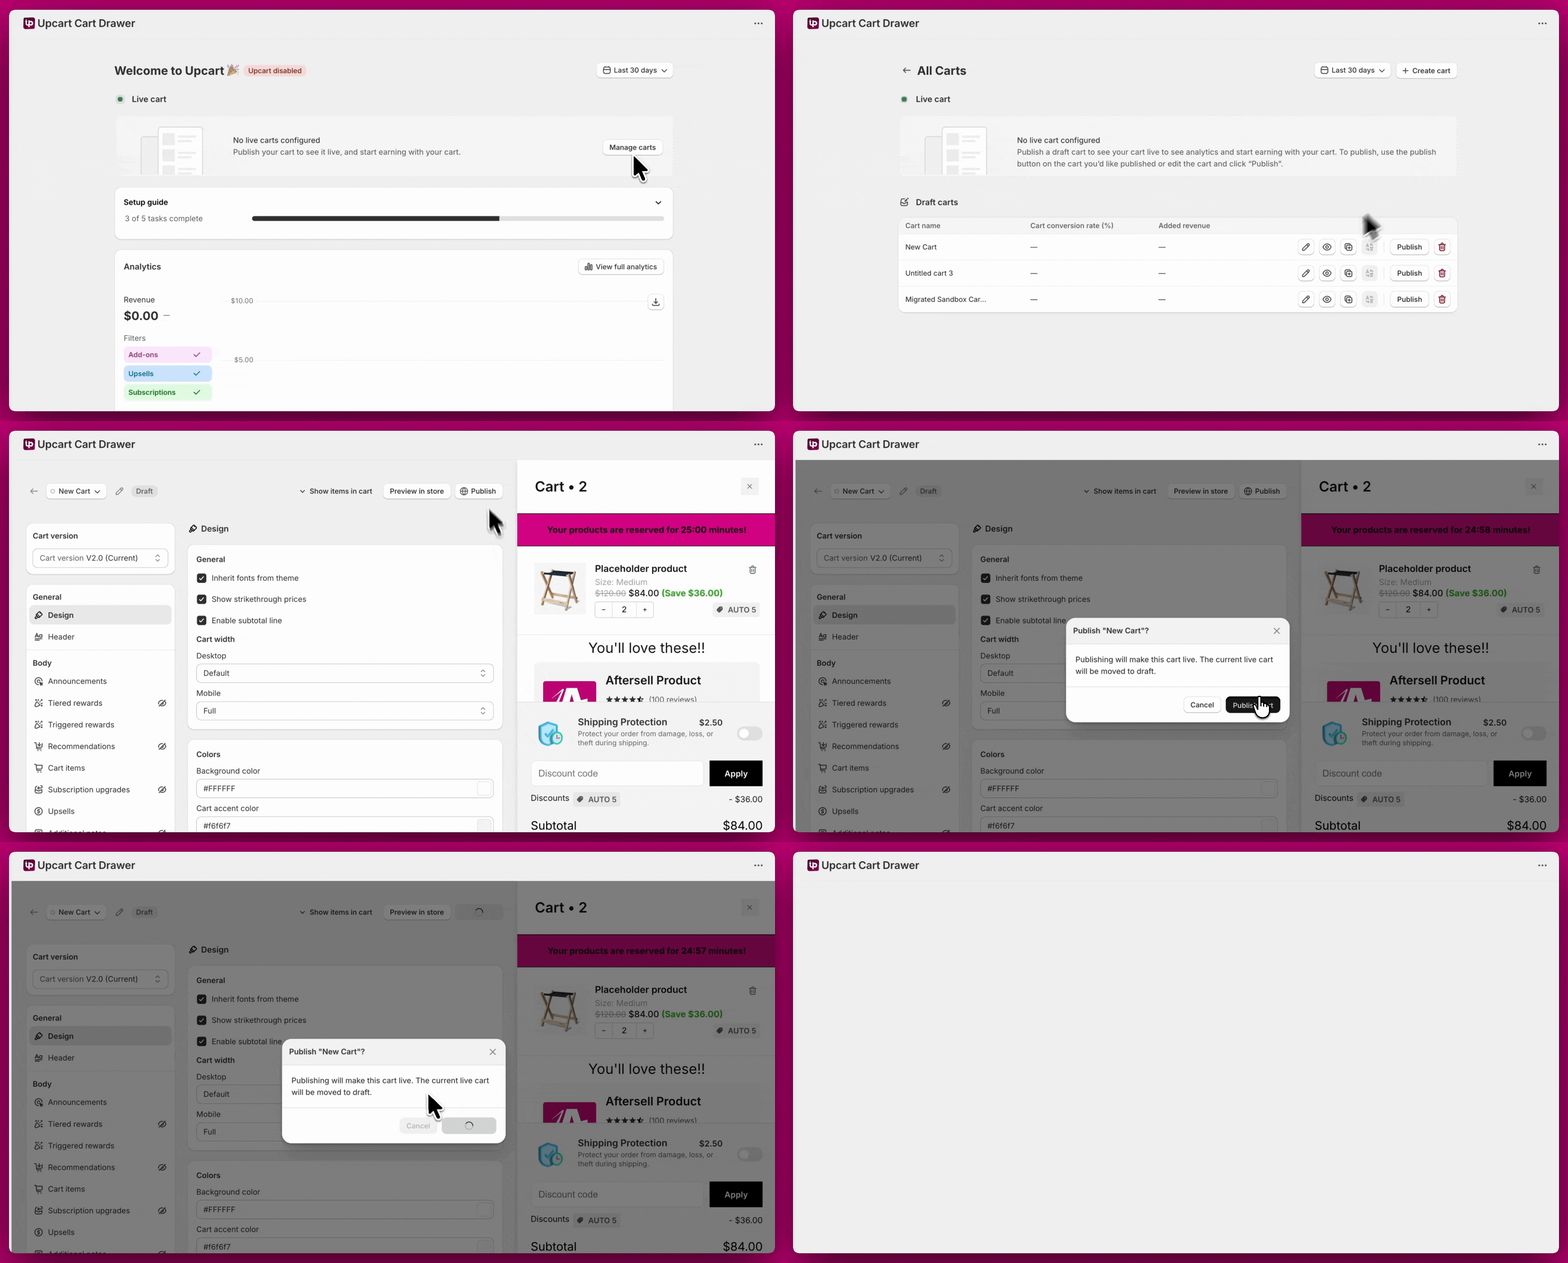
모든 설정이 완료되면 **Manage All Carts** > 활성화할 카트 선택 > **Publish**를 클릭하세요.

게시되면 카트가 카트 테이블의 라이브 섹션으로 이동해요. 테마에서 Upcart 앱 임베드를 활성화할 때까지(다음 단계) 경고성 **"App embed off"** 배지가 표시돼요. 임베드를 켜면 배지가 녹색 **"Live"** 배지로 바뀌어 카트가 스토어프론트에 표시되고 있음을 확인해 줘요.

<Note>
  앱 임베드는 Upcart 카트 드로어가 스토어프론트에 표시될지 여부를 제어해요. Discounts를 설정해 두었다면, 앱 임베드가 비활성화된 상태에서도 해당 규칙은 Shopify의 할인 시스템을 통해 계속 활성 상태로 유지돼요.
</Note>

<img src="https://mintcdn.com/aftersell/uVGuDiyXpd6WOLO4/images/upcart/quickstart-publish-cart-confirmation.gif?s=e8cc3d709577ee5a1ab9848afb9f6269" alt="Publish 확인 대화 상자가 열려 있는 Upcart의 카트 게시 화면" width="2008" height="1080" data-path="images/upcart/quickstart-publish-cart-confirmation.gif" />

<div id="step-two-enable-theme-app-embed">
  ### **2단계: 테마 앱 임베드 활성화하기**
</div>

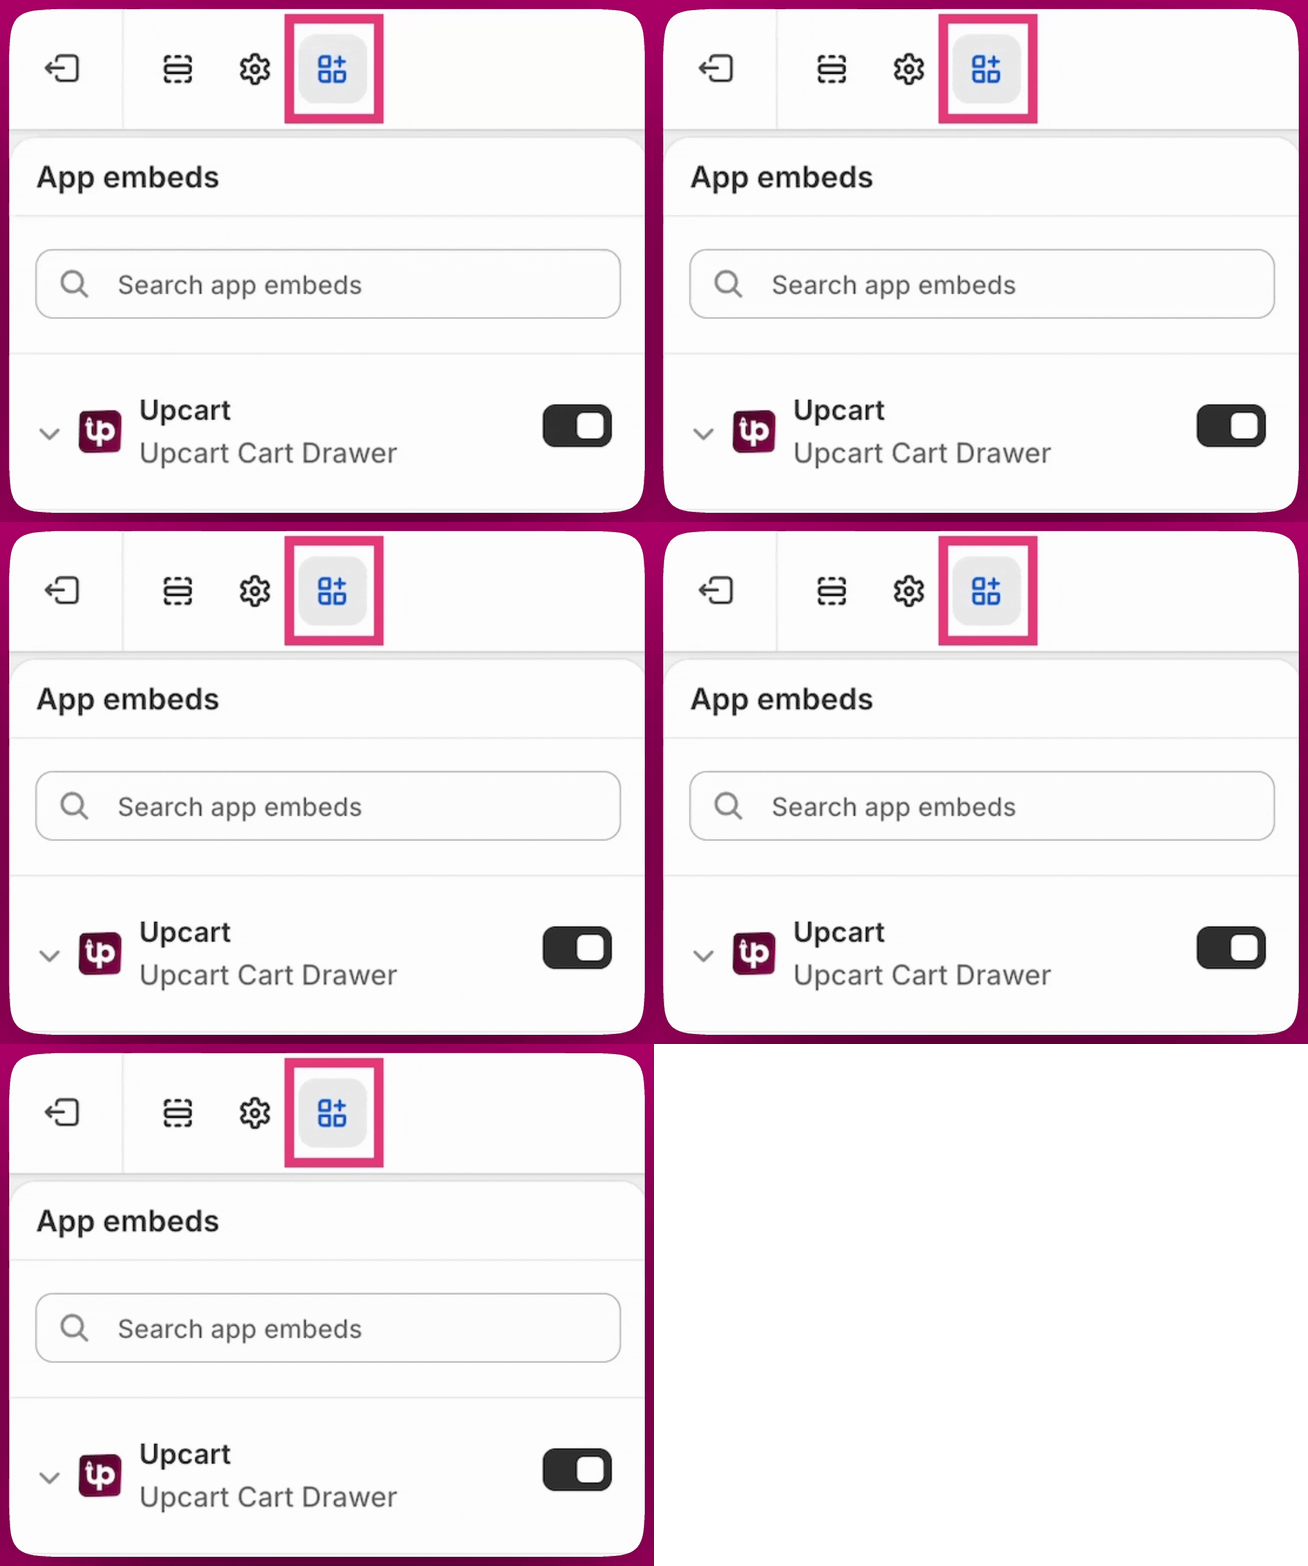
테마에서 Upcart를 활성화하려면 **Shopify Admin → Online Store → Themes → Customize → App embeds**로 이동해 **Upcart** 앱 임베드를 활성화하고 **Save**를 클릭하세요.
<img src="https://mintcdn.com/aftersell/uVGuDiyXpd6WOLO4/images/upcart/quickstart-app-embed-toggle.gif?s=9244c8509f67622ebb4e1cc2af7ecebb" alt="Shopify 테마 App embeds 패널에서 Upcart Cart Drawer 토글을 활성화하는 모습" width="1352" height="1080" data-path="images/upcart/quickstart-app-embed-toggle.gif" />

문제가 발생하거나 호환성 이슈가 있으면 언제든지 **지원 채팅**으로 문의해 주세요.